Legend has it that seminal environmentalist and park advocate John Muir took little more than bread and tea into the High Sierra starting in the late 1800s. A century later, maximalism ruled, with backpackers schlepping 50-plus pounds of gear and food into the wilderness, carried in clunky, external frame packs. In the mid-1990s, the mindset shifted again with the rise in popularity of America’s long-distance treks, like the Pacific Crest Trail (PCT) and the Appalachian Trail (AT), and improved materials have helped create a resurgence of Muir’s “less is more” mentality.
So, what is ultralight backpacking? While no official definition exists, the practice is more about a frame of mind than an arbitrary pack weight. It's about deciding what you can do without and how you can find the lightest version of your essential gear. Most ultralighters find their sweet spot between, say, a 12- to 25-pound trail weight.
As utopian as this all may sound, going ultralight does come with a few trade-offs. For example, relying less on physical gear means relying more on your own judgment and experience for how to stay safe, healthy and comfortable while on the trail. (Though this doesn't mean forgoing the 10 Essentials. Ultralight or not, you must carry these items into the backcountry with you.)
Before you begin replacing your gear or building out a new kit, we have a few tips to guide your decision-making:
- Weigh your gear: Find a kitchen and/or luggage scale and weigh your gear. Make a note of your current base weight, which is your pack and everything in it except for food, water and fuel (otherwise known as consumables).
- Replace older gear with ultralight gear: As you replace your old gear and choose new items, pay close attention to each item's weight. Try to aim for a total base weight of about 10 to 12 pounds. (Be aware that once you add consumables, that weight can easily double.)
- Gradually update your big items: We get that ultralight gear is often ultra-expensive. To spare your wallet, consider lessening your pack’s weight over time. Replace one big-ticket item each season with a lighter (and potentially more costly) model.
- Understand the trade-offs: Ditching your plush sleeping pad and sturdy, spacious tent might seem like no-brainers, but keep in mind that some ultralight gear may not be as durable or as comfortable as conventional gear.
Once you know your starting weight and understand the trade-offs of going lighter, you're ready to begin creating your ultralight kit. We talked to Brittany Goodson, a veteran PCT hiker and treasury analyst at the co-op, for some insider tips on what to buy and how to pack.
Click below to jump to specific tips or keep scrolling to read the full story:
- Tips for choosing an ultralight pack, shelter, bag and pad
- Tips for packing water, fuel and food
- How to comfortably fill an ultralight backpack
- Ultralight tips and tricks
- How non-ultralighters can benefit from ultralight principles
The Big Four: Backpack, Shelter, Sleeping Bag and Sleeping Pad
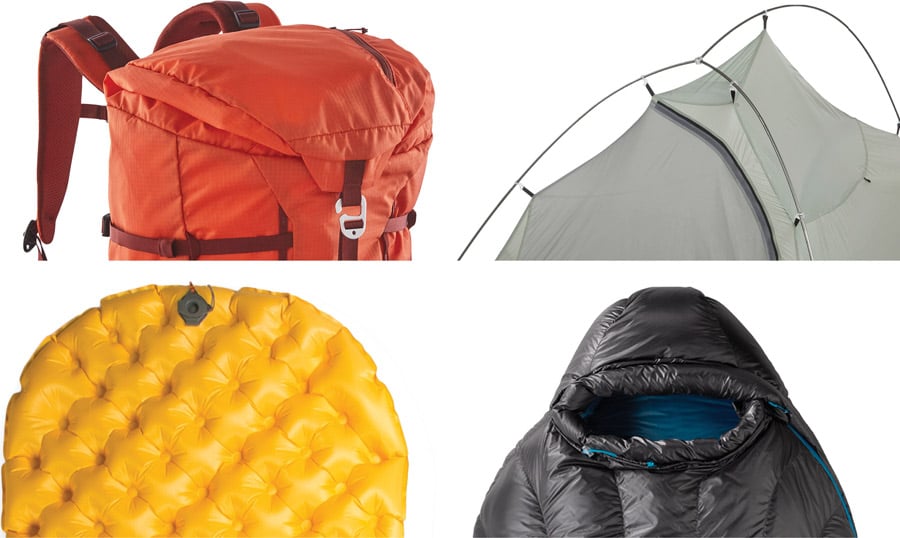
The fastest way to lighten your load is to replace one or all of the four largest items most backpackers carry: pack, tent, sleeping bag and pad.
Backpack
While a traditional weekend warrior might have a 65-liter pack that weighs anywhere from 3 to 6 pounds, hardcore ultralight devotees may choose a frameless, minimally padded 40- to 50-liter pack, weighing a scant 1.5 to 2 pounds. The compromise? Most of these featherlight backpacks have a load limit of 30 to 35 pounds, meaning you’ll have to pack strategically to create a comfortable carry.
“Most ultralight packs have roll tops, because having that extra bag on the top, which they call a ‘brain,’ is just added weight,” says Goodson. She also warns against selecting an ultralight pack and then trying to cram all of your old, heavy gear into it. Many lightweight rucksacks have foam frames instead of stronger aluminum or carbon fiber. A number of niche outdoor brands have started creating ultralight backpacks with minimalist carbon fiber frames weighing well under 2 pounds and boasting improved load limits. “If you are carrying a little bit too much weight, it gets uncomfortable very fast,” she says.
Shelter
Tents: If you prefer the cozy, closed-door feeling of sleeping in a tent, select one with a full-mesh canopy (and a robust rainfly) to keep out insects and other small critters. Many thru-hikers and ultralight diehards opt for a trekking pole–supported structure, which saves weight on internal tent poles. (Learn more at Backpacking Tents: How to Choose.)
Tarps: If you’re traveling in a warmer climate, you can create a decent rain shelter with an ultralight tarp and a little know-how. Bring solid guylines and make sure you’ll have two good trees, large sticks or trekking poles that can support the tarp all night.
Bivy sacks: Bivy sacks are waterproof encasements, generally weighing between 1 and 2 pounds, that fit around your ordinary sleeping bag. What you’ll lack in square footage and comfort, you’ll make up for in weight savings.
Ultralight hammocks: Hammock backpacking has become increasingly popular, particularly in areas where it’s easy to find sturdy trees for proper hanging. Many hammock-specific brands have built out a cottage industry of accoutrements, which may include a bug net, rainfly, hammock-specific sleeping pad or ultralight straps. (Related article: How to Choose Hammocks.)
Sleeping Bag
Serious about going ultralight? Pick a down-insulated bag. Down is lighter and more compressible than synthetic fill. Plus, most down is now treated to be water-resistant. Overnight hikers can easily find a down bag weighing 1.5 to 2 pounds with a lighter-weight fill power of 800 or 900. Here’s how we’d recommend selecting a great ultralight sleep sack:
Choose a bag no warmer than you really need. Extra warmth often means extra weight. You can add warmth by wearing your jacket and other layers to bed.
Choose a mummy-style bag without a hood. Save weight by reducing the amount of down and fabric you’re carrying. Wear a hooded jacket and/or a warm knit hat on chilly nights.
(Related article: Sleeping Bags for Backpacking: How to Choose.)
Sleeping Pad
While car campers might adore their trusty self-inflatables, most backpackers these days go for lightweight sleeping pads they’ll need to blow up. Full-length versions of these pads can weigh less than a pound, and they still offer loads of cushioning and a layer of toasty insulation. Some thru-hikers opt for a flimsy foam pad, but Goodson says that level of self-sacrifice may be overkill.
“There's really no reason to sacrifice good sleep for a foam pad,” she says, adding that when she hiked the PCT, she only carried a closed-cell foam pad during the desert sections (to avoid errant spiny plant bits from puncturing her thin mattress). “A lot of people do bring a foam pad to start with, and then they switch once they get to the Sierras because [an inflatable pad] is just way more comfortable,” she says.
You can shave off even more weight by choosing a torso-length pad or cutting some length from a closed-cell foam pad. Layer your pack or extra clothing under your feet for insulation from the cold ground.
(Related article: Sleeping Pads: How to Choose.)
Water, Fuel and Food
After the big four, these are likely the heaviest items in your pack. Try to carry only as much as you need for the time you'll be out on the trail. Below are some tips to figure out what that might look like for you.
Water
Pro tip: You don't need to carry all the water you plan on drinking for the entire day. And if you’re going ultralight, you probably won’t want to: One liter of water weighs in at 2.2 pounds, so the water you carry in a full 3-liter bladder can quickly add up to half your base weight. Do some research before setting off and find where reliable streams, rivers and lakes are along your route. Unless you’re coming up on a long stretch with zero water, it’s generally OK to only carry 1 liter at a time.
Here are a few other ways that weight-conscious backpackers think about water usage:
"Camel up." Before you leave camp each morning, filter and drink a large amount of water as you eat breakfast (think 1/2 to 1 liter). Then, do the same each time you reach a water source. You’ll leave each refill site well-hydrated, making it safer to carry less water on your way to the next one.
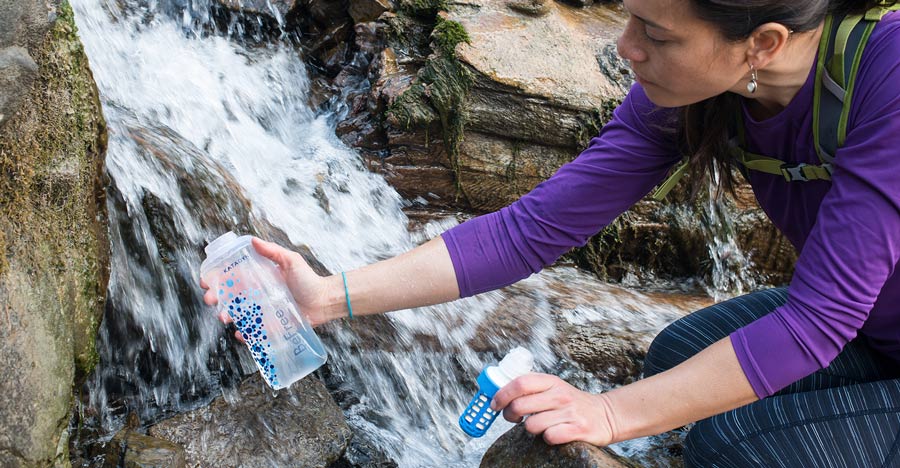
Carry a mini filter. Many small water filters weigh only 2 ounces. Goodson says that savvy ultralighters typically carry a tiny filter and a handful of backup water purification tablets to save on weight.
Use collapsible water bottles. A soft bottle can be 80% lighter than a hard-sided plastic water bottle. Similarly, Goodson says you could swap your heavy reusable plastic water bottle for a disposable sports drink bottle with a screw top that matches your mini filter.
Fuel, Stove and Cookware
To keep their packs slim, many ultralight backpackers simply boil water to add to dehydrated food, rather than hauling cans of soup or cooking homestyle meals from scratch. This saves weight on both food and fuel.
Try to make cookware and hard-sided items dual-purpose. For example, a titanium mug can also serve as a pot or a bowl. And, of course, a spork pulls double duty as two utensils.
Popular ultralight stove options:
Canister stove: These tiny folding stoves may weigh only 2 to 3 ounces, and they screw onto premeasured isobutane canisters. If you learn (through practice) how many meals you can typically get out of one canister, you can reduce extra fuel weight on longer treks. A good rule of thumb is to plan for 2 ounces per day (that's enough for one person eating two meals each day).
Tablet fuel stoves: You can make these stoves out of an aluminum can or purchase one from an outdoor gear store. They utilize small fuel tablets to create a small open flame to cook over. Bring roughly one fuel tablet per day (or per meal) as you figure out your needs.Alcohol stove: These traditional backpacking stoves weigh a mere ounce, but are becoming less popular due to significant fire bans in the western half of the United States, says Goodson. They consist of a metal cylinder you pour an alcohol-based fuel into, then light and cook over. For AT hikers out east, this is still a trusted featherlight stove option.
Integrated canister stove system: If you’re trekking with two or more people, it might make sense to pack an integrated canister stove system, like a Jetboil. While heavier, this system boils water incredibly quickly, allowing hikers to save weight by bringing less fuel.
Learn more at Backpacking Stoves: How to Choose.
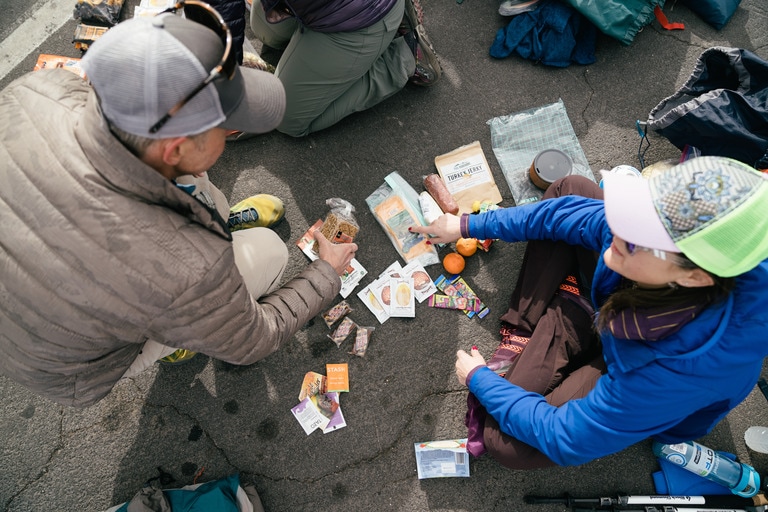
Food
Hiker hunger is real. When you’re out on a long-distance backpacking trip, you’re probably burning significantly more calories than you would in day-to-day life. Plan on bringing 3,000 to 4,000 calories’ worth of food per day, depending on how many miles you cover and how strenuous the elevation change is.
That can be a hefty load of food to add to your pack. Here are a few ideas for how to eat well while packing lightweight:
Go instant: Instant coffee and instant oatmeal are quick, fuel-efficient breakfast options. Similarly, premade dehydrated dinners require only boiling water to cook.
DIY packaging: Store each dehydrated dinner in a zip-top freezer or quart bag and add your hot water directly into it. These freezer-safe versions of sandwich bags are thick enough to withstand near-boiling water. This is a common practice among gram-counting folks like thru-hikers, but if you're less concerned about weight and want to avoid adding hot water to plastic, you can use a metal cookpot or a reusable silicone bag.
Be calorie conscious: Bring fat- and calorie-rich snacks for every meal. “Things that have high fat content are helpful just to keep you fuller for longer,” says Goodson. Peanut butter, protein bars, nuts, seeds, chocolate, dried fruit, powdered supplements, hard cheeses and sausages are all great options. Want to add even more calories to your favorite backpacking meal? Pack a small container of olive oil, says Goodson. (Related article: Backpacking Food Ideas and Meal Planning)
Dehydrate food at home: For those who love to play chef at home, this method can save you money and avoid bulky packaging. Plus, you get to create and season your favorite meals to enjoy in the wilderness. (Related article: How to Dehydrate Food)
Try cold soaking: Some ounce-counting backpackers elect to go stove-less. “They soak their food in the morning, put it in a sealable bag and keep it in their backpack all day,” says Goodman. Need to caffeinate? Goodman says her cold-soaking PCT hiker friends add flavored packets of caffeine to their water. (Related article: A Guide to Cold Soaking Your Food)
How to Comfortably Fill an Ultralight Backpack
Homegrown companies designing ultralight gear and backpacks seem to be popping up everywhere, and even big name brands have released featherlight tents and overnight packs to help hikers lighten their loads. Here’s how to take that lightweight gear and properly stuff it into a pack without a robust internal frame.
Goodson recommends putting soft items that you won’t need until you reach camp at the very bottom of the backpack: think extra layers and a sleeping bag. “Having your heavier stuff closer to your back and toward the [backpack’s] middle is definitely the way to weight it out, to make it more comfortable,” she says.
Goodson also says to skip the stuff sacks. Instead, “you can cram a jacket or a pair of socks in the small spaces, so you're filling up all your space a little bit more efficiently,” she says. Repackage things like a first-aid kit and snacks into reusable plastic freezer bags, and shave weight by using an ordinary garbage bag as a pack liner, to keep your kit dry. Lastly, choose a pack with large, stretchy side water bottle pockets so you can quickly stash a wet tent’s components away from your warm clothes and sleep sack.
Ultralight Tips and Tricks
Don't skimp on safety: As you lower your pack weight, keep in mind that every time you step into the backcountry, you should still pack the Ten Essentials. While it's smart to pack lighter, it's smarter to pack safely.
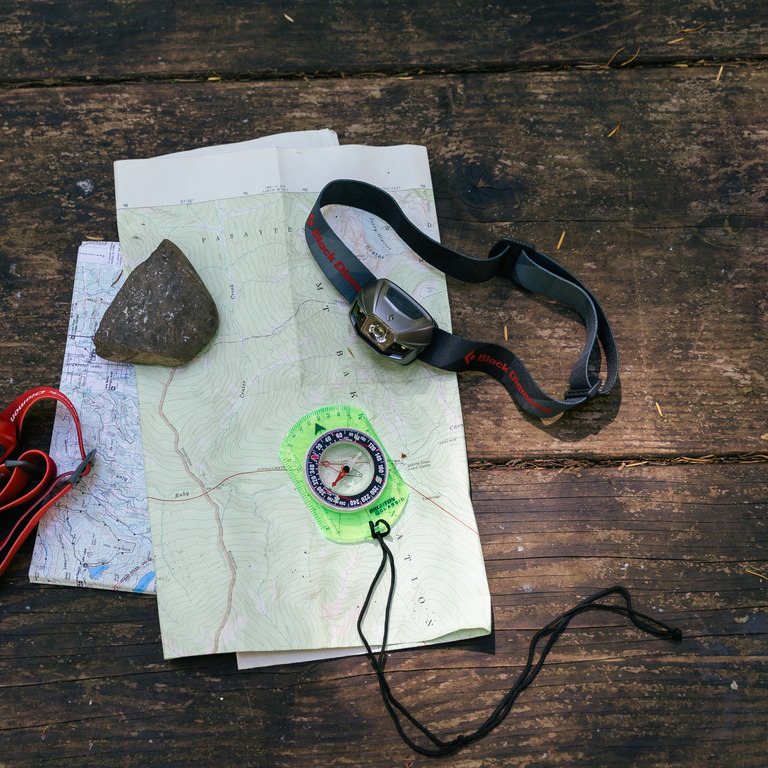
Navigation system: Bring a map, compass, and a GPS watch or device. Learn about the pros and cons of packing a personal locator beacon with satellite messaging. These add some weight, but they can give you (and your loved ones at home) peace of mind knowing that you can send "I'm fine" messages or summon emergency help.
Safety whistle: A lightweight yet loud whistle can be worn around your neck so it's ready to use in a dire situation. Three blasts is the international distress call for help.
Sun protection: A good sun-shading hat should be your first line of defense, and bring a few ounces of sunscreen in a small bottle and a tube of lip balm rated UPF 30 or 50. In the desert, consider hiking in sun gloves and wearing a long-sleeve UPF 50+ shirt. Similarly, polarized sunglasses are a necessity for good eye health.
Illumination: Find a no-frills kids' or adult headlamp weighing 2 or 3 ounces. Many current models are designed to be rechargeable, so you can spare additional weight by not bringing extra batteries. Simply pack a small power bank to charge your phone or camera as a backup, then make sure it’s juiced up on your rest days. You can also light up your camp with a small, lightweight LED lantern that runs via solar charging or on a single AA battery.
Insulation and clothing: , Always carry a lightweight puffy jacket to give yourself a safety margin should temperatures suddenly plummet. When choosing base layers, many ultralight hikers go for long underwear bottoms and a long-sleeve top as well. Pro tip: Merino or alpaca wool is naturally antimicrobial and won’t stink up as quickly as their synthetic counterparts.
Many long-distance backpackers swear by running shorts with built-in underwear for hiking, but bring long pants if you expect any scrambling or bushwhacking along your route. Bring two pairs of wool or synthetic underwear (wear one, wash one) and two or three pairs of wool or synthetic socks to ensure you’re sleeping with dry feet each night.
Rain gear: This includes your rain jacket, rain pants, pack cover (or internal trash bag) and optional waterproof rain mitts. Keep these at the top of your pack for quick access, in case you encounter a rogue thunderstorm.
Bandana: This seemingly simple clothing item is so versatile that it's worth a special mention. Wear it as a headband, as a sun cape under a cap or as a damp cooling cloth around your neck. It can also be used as a towel for dishes or for drying your body, plus it doubles as a pot holder, a bandage or even a tourniquet in case of emergency.
Footwear: Most ultralight backpackers wear lightweight hiking shoes or trail runners. Before you make the switch from sturdy, supportive boots, work to strengthen your feet by training them on load-bearing day hikes before your big trek. Many hikers opt for non-waterproof footwear, as it dries quicker.
Scaled-down first-aid kit and repair kit: We’d recommend bringing a few of the following: blister pads, gauze pads, bandages, antibiotic ointment in tiny packets, pain-relief pills and a razor blade (which can take the place of a knife or scissors). Bring a few inches of duct tape, wrapped around a water bottle or lighter to save space. A piece of gear-specific repair tape is also useful in case you get a hole in your pack, sleeping bag or air pad.
Cleaning and hygiene: Here's a minimalist assortment of items we’d recommend packing to stay healthy and happy on the trail:
Small bottle of hand sanitizer, to use after going to the bathroom and before preparing meals.
Travel-size tube of toothpaste (squeeze out part to use at home, depending on how many days your trip will be) or chewable toothpaste tablets.
One toothbrush, cut the handle in half to save weight, or a kids’ toothbrush.
Small bottle or bar of biodegradable soap (for cleaning your hands and body outside of camp, never in a wild water source)
Two premoistened wipes per day (one for your hands, neck and face; one for your nether regions). At home, take your allotted wipes and leave them out overnight to dry a bit, which lowers their weight. Put them in a zip-top bag and remoisten them, if needed, with a bit of filtered water at camp. Remember to pack out all used wet wipes and toilet paper.
Two squares of toilet paper per day: Cut heavy-duty paper towels into 4-inch squares in place of regular toilet paper or measure out a few wads of regular toilet paper and leave the rest on the cardboard at home. Put the paper into a zip-top bag so that it stays dry, and carry an extra zip-top waste bag to pack out.
Pee rag for women: 1/4 of a full-size bandana works well, or purchase a pre-made pee cloth like a Kula cloth from an outdoor gear store. Tie it onto the outside of your pack so it dries as you hike.
Backpacking trowel: Consider bringing an ultralight shovel for digging cat holes. Save on TP by wiping first with soft leaves, smooth stones or sticks, then use a square or two of paper to finish the job.
Learn more in our articles, Backcountry Bathroom Basics and Backpacking With Your Period.
Trekking poles: Far from extraneous pack bulk, these simple sticks are invaluable for maintaining balance on rocky terrain, alleviating knee strain on uphills and downhills, and serving as shelter poles. Though pricey, carbon fiber offers the lightest possible weight for hiking poles.
Luxury items: Even serious ultralight hikers bring at least one thing that makes their journey a little more pleasant. It could be a pair of small binoculars if you're a birder, a small cork ball to roll out muscles or a journal to take notes in. Allow yourself a treat or two for the trail. It is your vacation, after all.
Apply Ultralight Principles to Your Regular Backpacking Kit
We get it; not everyone wants to forgo a cozy tent or cut their toothbrush in half. However, there are lots of ways to apply ultralight backpacking tenets to your existing camping kit and make the trek a little easier. Here are a few of our favorite strategies:
Downsizing “the big four” can quickly get expensive. Instead of maxing out your credit card on a whole new setup, start with just the tent, says Goodson. A simple swap from a conventional tent to an ultralight model can instantly reduce your pack weight by 3 or 4 pounds. Then, the uphill to a phenomenal viewpoint won’t feel quite so burdensome.
Repackage premade backpacking meals into zip-top freezer bags to save space for more luxury items.
Invest in great pockets. One thing ultralight backpack brands have down? fantastic pockets for stashing gear. If you’re an organizational neat freak (raises hand), consider investing in a lightweight pack with loads of mesh or elastic compartments for stowing your pole-free tent, camp shoes and extra snacks within arm’s reach.
Keep everything multiuse. Goodson says this simple rule truly transformed her understanding of how to save weight and waste when backpacking. Maybe you’ll opt for a lightweight down quilt instead of a sleeping bag and wear your puffer jacket to bed, or use your cookpot as a morning coffee mug. Even if your entire camp setup isn’t ultralight just yet, this frame of mind can begin to lighten your load without spending a dime. Often, the more we learn to enjoy our lives with fewer luxuries, the happier we’ll be living a simple life back home, too.