As a "flatwater" kayaker, you soon realize that there are times when the water is anything but flat. Choppy seas are an inevitable part of the game. That's when more advanced skills can be your friend:
- Edging: Gives you better balance and more control of your boat
- Low brace and high brace: Two ways to reverse a capsize and right your ship
Which brace you use is partly personal preference and partly a matter of how you're holding the paddle when things start to go sideways. We recommend you learn both.
Prerequisites
You should feel reasonably confident in your basic kayaking strokes, including forward, sweep, reverse and draw strokes. Knowing how to do a wet exit is a must. Knowing how to do T-rescue is important for a group setting and knowing how to do a self rescue lets you practice alone. To be sure your boat is correctly adjusted to fit you, read Getting Started Kayaking.
Kayak Edging
Edging is when you tilt your kayak slightly to one side. The key is to hold it firmly at a balance point that enhances control of the boat and lets you do things like carve a more precise turn or turn more quickly. When you rotate the boat level again, you also are doing the final recovery step of a brace stroke. Thus edging is also a prerequisite for bracing.
Learn how to edge a kayak using this simple exercise:
- With your kayak stopped, raise the paddle shaft up to your shoulders, rotating your wrists backward as you do so.
- Open up your grip, letting the shaft rest at the base of your thumbs.
- Let the lower body control the boat. Raise one knee slowly, which will lift up the side of the boat where the knee is in contact with the boat.
- Be sure that only the boat is leaning, not your upper body—hold your body as upright and as close to the boat's centerline as you possibly can.
- Return the boat to level by slowly raising the opposite knee.
Repeat this process, alternating the side where you are edging. The goal is to never spill imaginary trays of drinks that are on each end of the raised paddle shaft. Practice until you can hold and balance the boat on each edge using only your lower body to control the boat.
Once you are comfortable edging this way, incorporate your paddle and try some sweep turns on the opposite side of your edge. You will turn more sharply and precisely than if you had done a non-edged turn. After doing this on each side of the boat, you can string together a series of turns, carving a figure 8 pattern on the water.
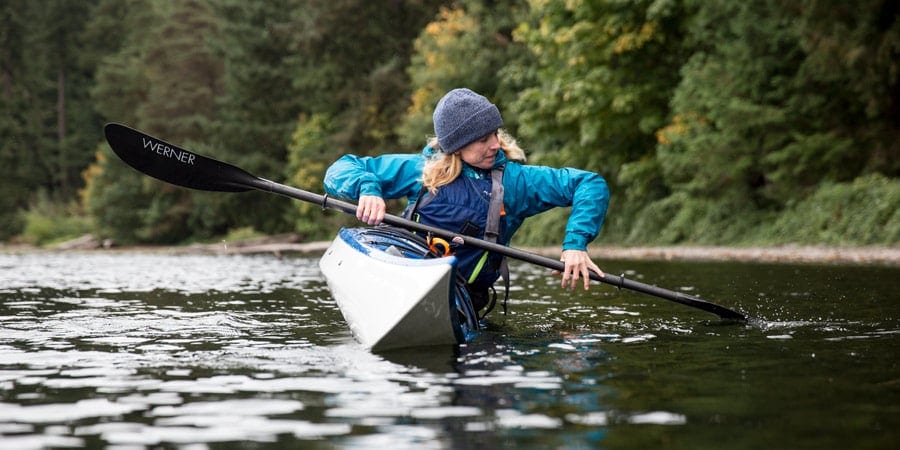
Kayak Bracing
Bracing is an emergency maneuver that allows you to reverse the momentum of a boat that's rolling sideways toward a capsize.
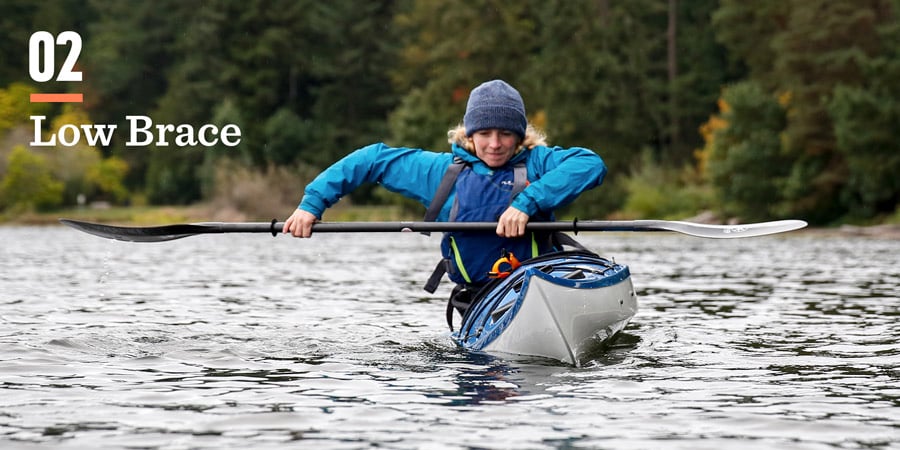
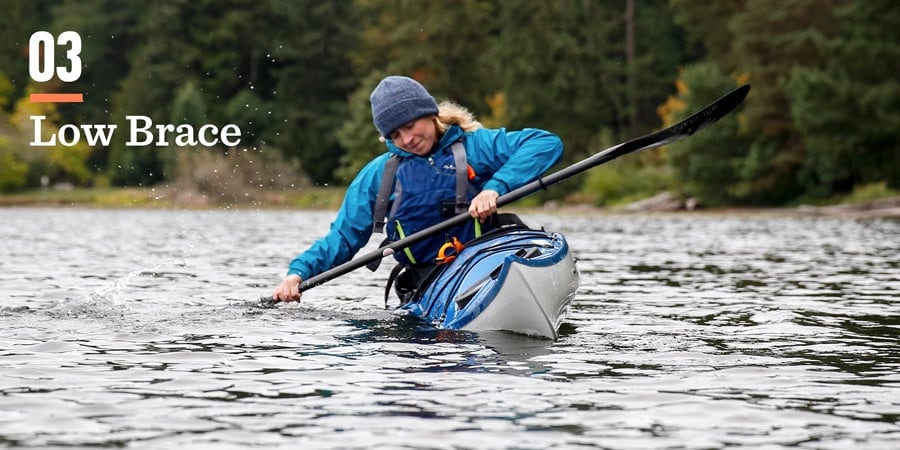
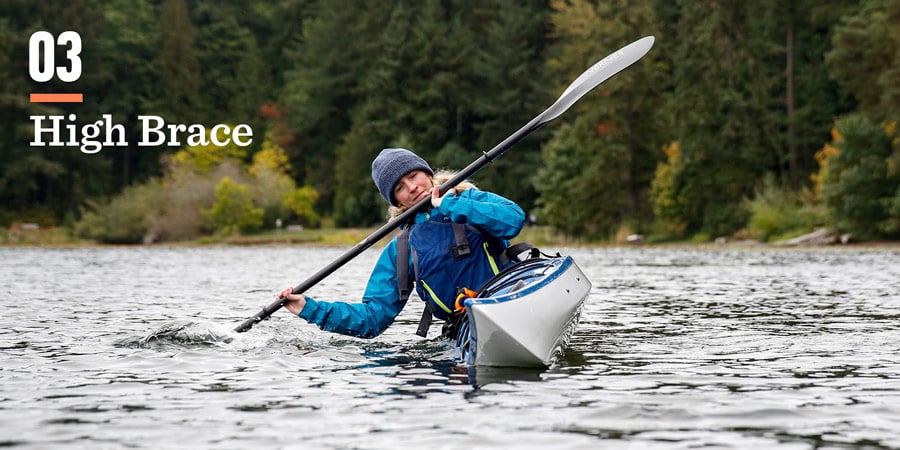
Low Brace
As you might imagine, the name comes from the fact that the paddle shaft is held relatively low in front of you when you start.
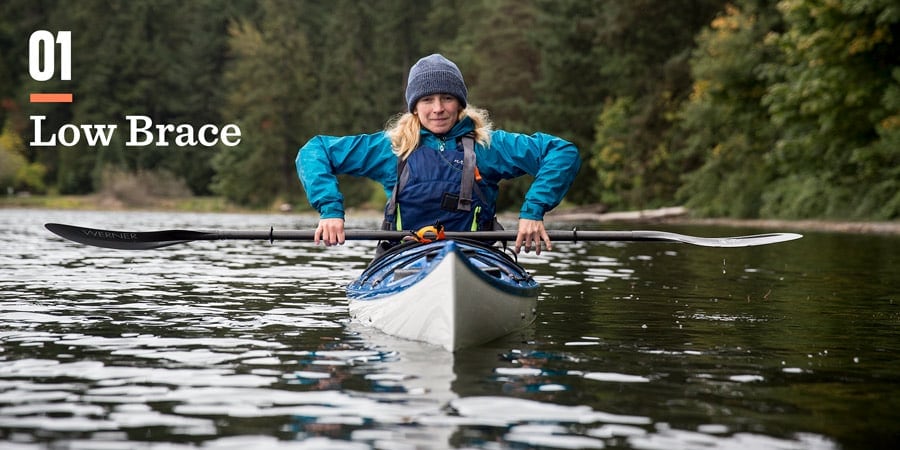
1. Rotate your wrists forward so that the back face of the paddle blade on your brace side is parallel to the water. Your elbows will be pointing upward, with your wrists directly below, as though you're preparing to do a push-up off of the paddle.
2. Edge the boat toward the brace side.
3. While keeping your elbow up, reach out with your blade and slap the water. Lean your head onto your bracing-side shoulder at the same time.
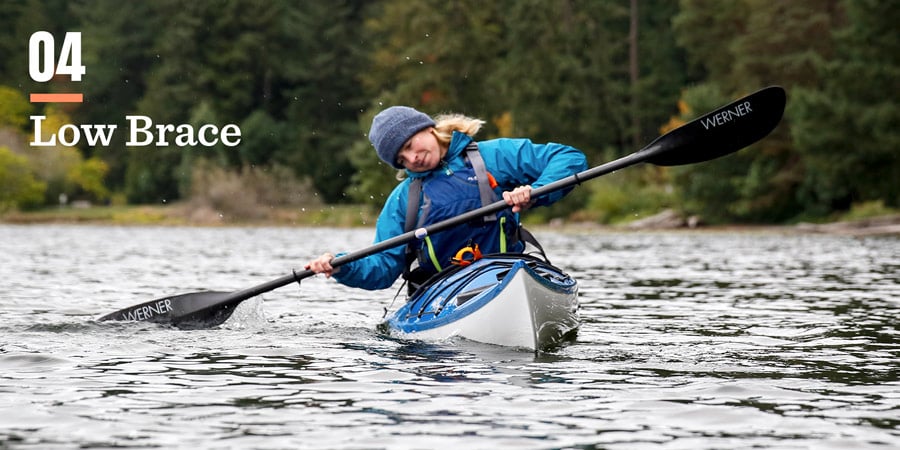
4. Simultaneously raise your knee and keep your head tilted until the boat is upright. Your head should be the last thing to come up after bracing.
High Brace
As the name suggests, the paddle shaft starts out higher compared with the low brace.
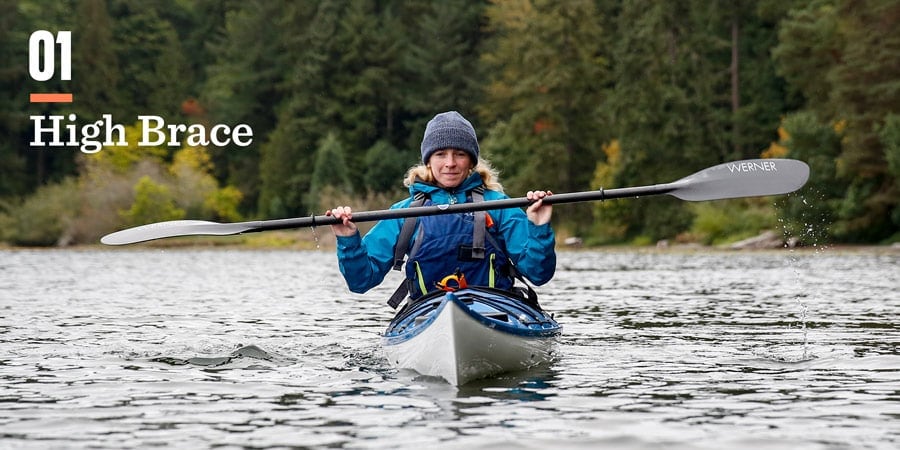
1. Rotate your wrists backward so that the power face of your paddle blade on your brace side is parallel to the water. Your elbows will be pointing downward, as though you're grasping the paddle, pull-up-style.
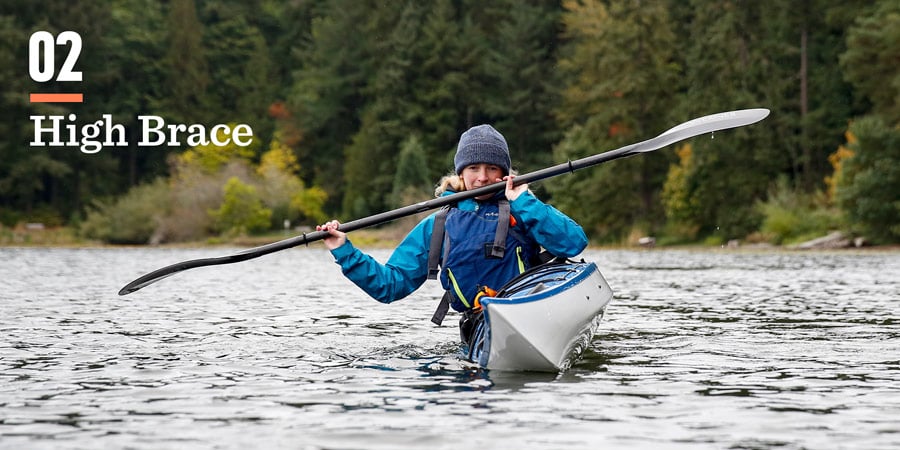
2. Keeping your elbows low, edge the boat toward the brace side.
3. Still keeping your elbow low on that side of the boat, reach out with your blade and slap the water. Lean your head onto your bracing-side shoulder at the same time.
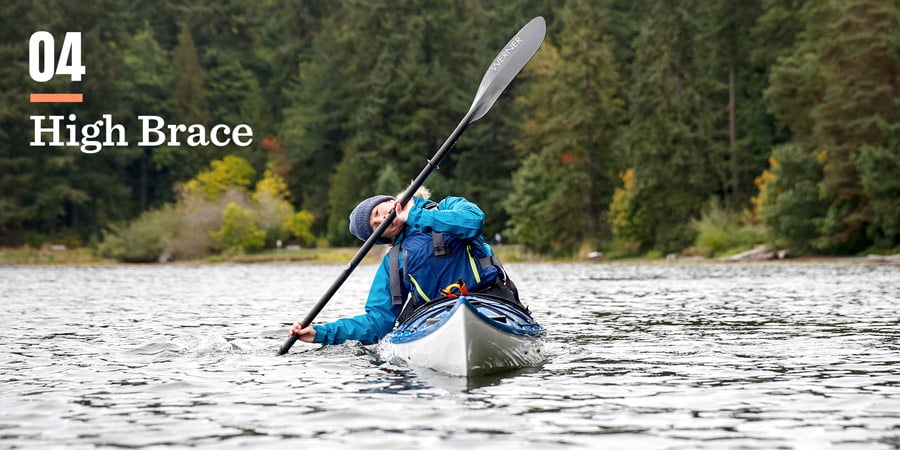
4. Simultaneously raise your knee on your bracing side and keep your head tilted low on your bracing side shoulder until the boat is upright. Your head should be the last thing to come up after bracing.
Bracing in a Sit-on-Top Kayak
Sit-on-tops are super stable and mostly used in warm-water areas, so capsizing is less of a concern. You can do a modified version of the low brace in a sit-on-top, though. Instead of lifting a knee, you move your lower body to shift your weight to the opposite side of the boat.
Keys to Proper Bracing
Keep these technique tips in mind for both the high and low brace:
- To avoid overstressing a shoulder, try to maintain the paddler's box (discussed in Basic Kayaking Strokes)
- Keep your paddle in front of you and don't reach too far from the boat with your blade. You risk a shoulder injury because an extended arm places a lot of stress on the shoulder joint.
- Body position is key: Hold your lower torso upright and close to the centerline.
- Leaning your head toward your bracing side shoulder and letting it come up last are key, too. That helps position your upper body in a way that allows a balanced transfer of weight as the kayak moves back to its centerline. Watching the paddle blade helps keep your head leaned properly.
- Keep a firm, but gentle grip on the paddle (don't white-knuckle it)
- Progress by edging farther as you brace.
Honing Your Skills
- Practice in progressively choppier water that mimics the conditions where you're more likely to need to brace.
- Often your brace will be easier to do on the side of your dominant hand. Do extra practice on your weaker side until you become an "ambidextrous bracer."