Snow and ice are ever-changing environments that make climbing challenging and exciting. Mountaineers and sport climbers enjoy everything from moderate-angle glacier walks to the vertical choreography of waterfall climbing. You can find ice-climbing opportunities at sites ranging from volcanoes in the Pacific Northwest to spectacular frozen waterfalls in the Rockies or the Northeast.
This article discusses the climbing gear and basic techniques used on ice.
Shop REI's selection of ice-climbing gear.
Getting Started Climbing Ice
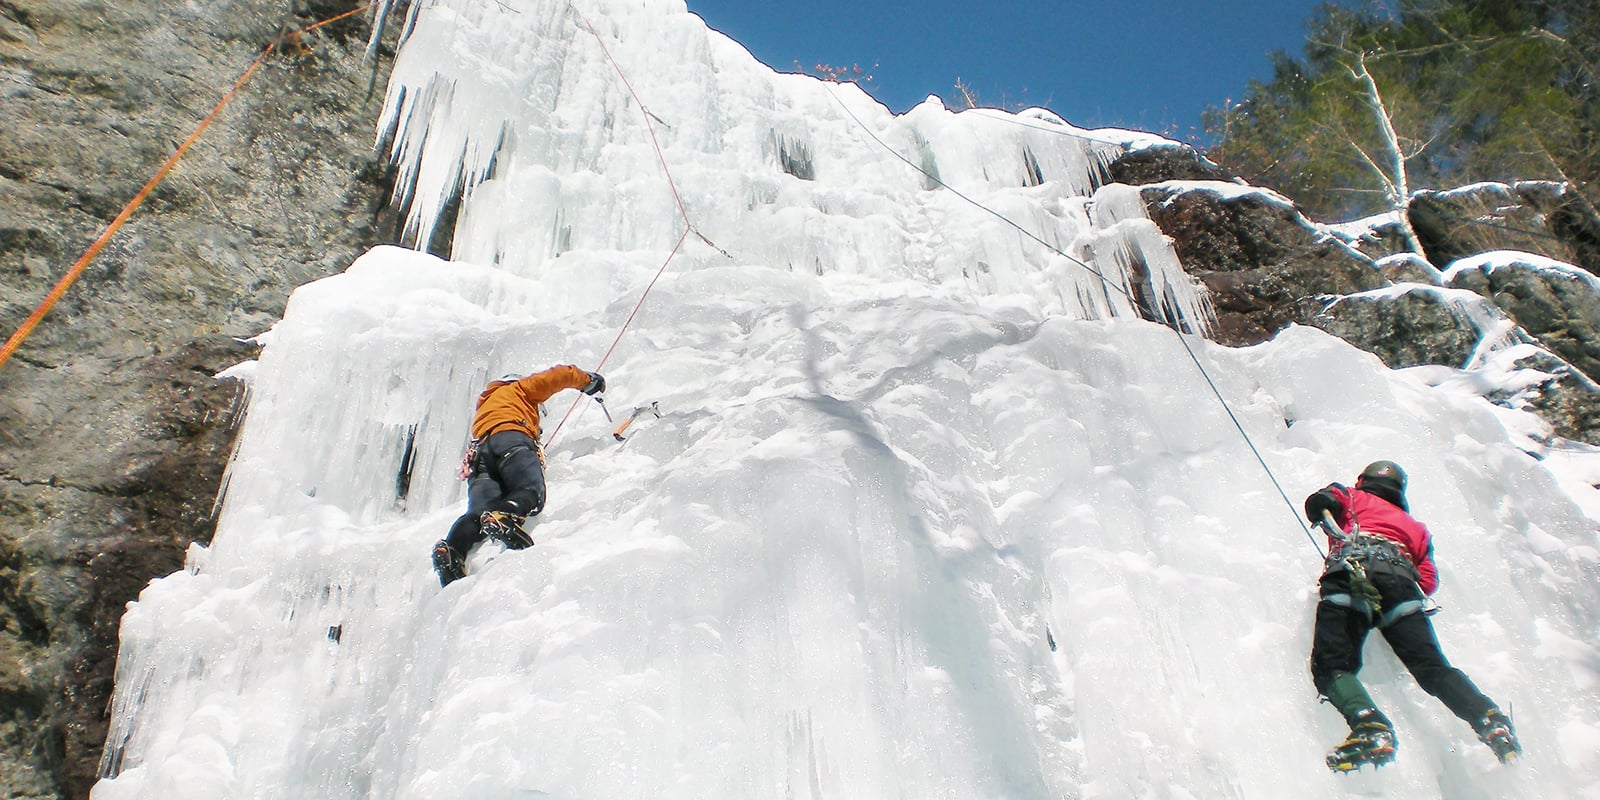
Ice climbing typically brings to mind frozen waterfalls. Here, a climber works their way up vertical ice with two axes, crampons toe-in to the ice.
Climbing alpine ice, though, can also include walking flat-footed with crampons and a single ice axe. A glacier is a larger and more variable beast than most winter-only waterfalls, so you need to use different techniques for changing ice conditions and slope angles.
First, we'll look at how you use your feet on the ice.
Crampon Techniques
Though it's possible to climb low-angle ice by using rough features or by chopping steps with an ice axe, at a certain point crampons need to be used for efficiency and safety.
Alpine climbing involves techniques adapted to different terrain. These styles are known as French and German techniques, for the areas in which they originated.
French technique: Also known as flat-footing on ice, this is the preferred technique for low-angle to moderately steep ice (slopes up to about 40°). All crampon points but the very front are kept in contact with the ice for traction. This is the most efficient way to travel over hard snow or ice. On lower-angle ice, climbing is simply a matter of pointing your feet uphill and planting them solidly, including your heels. As the slope angle increases, climbing requires greater ankle flexibility. It is easier to turn your toes outward to walk ducklike in order to keep the feet flat. On steeper slopes, you can progress diagonally up a slope with all points in, but with toes pointing across the slope or even slightly downhill.
Eventually, it becomes necessary to sidestep up the slope. To do this, plant your uphill foot solidly, then cross your lower foot over it and plant solidly. This cross-over upward progression requires care, as it is easy to catch your crampon points on the opposite boot, gaiter or crampon straps. It is important in the French technique to plant all points except the front 2. It is tempting to try to "edge" into a slope, placing only the inner row of points and leaving the outer points in the air. This is easier on your ankles, but your crampons can skate over the ice, allowing you to skate down the slope.
German technique: This is more commonly known as front-pointing, due to the fact that only the front-facing crampon points come in contact with the ice. It's commonly used on slopes of about 45° and up. The climber faces the slope and kicks his toes in to plant the 2 or 4 front points. It is the most direct way to ascend a steep slope but also the hardest on calf muscles since only the crampon frames support your feet. Unlike French technique, which takes some practice to get the footwork down, German technique is fairly straightforward. Kick, plant the front points, stand. Your body weight must rest on the few sharp points of your crampons and tools, so secure footholds are essential.
Combined technique: One way to make climbing moderately steep ice more comfortable is to mix the German technique (or toe-in to the slope) with flat-footing. This combination technique is known as the "3 o'clock position" or "pied troisieme" and is usually less tiring than straight flat-footing. It involves planting the front points of one foot while keeping the other foot splayed out to the side, sole flat against the slope.
Two common mistakes:
- Try not to kick repeatedly to set the crampon points. This and kicking too hard are not only tiring, but can weaken the ice you're standing on. You learn quickly enough about "dinner plates," or flakes of ice that come crashing out when you're too rough with tools or crampons.
- Another tendency is to keep one's heels up too high, allowing the front points to pop out. Lowering your heels leverages the front points farther into the ice and will help to avoid an unnecessary slip. This is especially important at the end of a steep section or a pitch that ends in a shelf or on flatter terrain.
Using Ice Axes and Tools
Walking on level or low-angle ice does not necessarily require the use of an ice axe. In fact, it's a good idea to practice your flat-foot technique (with and without crampons) without relying on your ice axe(s) so you learn the "feel" of the ice underfoot.
Of course, you carry and eventually use ice axes or tools on any ice climb. Longer mountaineering axes are often paired with shorter ice tools on alpine routes which involve both snow and ice travel. On steep, technical ice routes, 2 short tools are typically used, one with a hammer and one with an adze. The adze is used for clearing the ice before placing ice screws or for chopping steps or belay ledges. A hammer is used for pounding in ice pitons.
This section covers basics of using axes or ice tools on ice.
Ice Axe Techniques
For low-to-moderate-angle ice (up to about 45°) using French technique:
- Cane (piolet canne): The cane position is used when you are walking on flat to moderately steep terrain. Hold the axe by the head with the spike (at the end of the shaft) contacting the ice. This axe technique is combined with walking forward or duck-walking as explained in the crampon section above.
- Cross-body (piolet ramasse): As the slope angle increases, you turn your body sideways to the slope and progress diagonally upward. Here, the cross-body position is a more secure way to hold your axe. Grasp it by the head in your downhill hand and plant the spike across your body into the slope. This is especially useful if you are descending a slope by sidestepping.
For steep ice (45° and higher) using German technique:
- Low dagger (piolet panne): This position comes into play when you face into the ice or snow and start to front-point. Holding the axe by the head at the adze, push the pick into the slope at about waist or chest level. This is used for short stretches for balance and is better used on hard snow or soft ice. It's difficult to get much purchase on hard ice with this technique.
- High dagger (piolet poignard): This is the same as low dagger except that you are placing the axe above your head. Your hand is wrapped around the head of the axe with the pick facing into the slope. High dagger is used when the slope gets too steep for low dagger to be effective.
- Anchor (piolet ancre): The anchor position gives you even more security. Hold the axe near the bottom of the shaft. Swing the axe overhead to set the pick into the ice. Now, front-pointing, work your feet upward as you move both hands progressively higher on the axe shaft. Eventually, one hand will be holding the axe head, similar to the low dagger position. At this point, remove and place the axe again.
- Traction (piolet traction): This position is used on very steep to vertical or overhanging ice. When ice is very steep, 2 tools are necessary to maintain balance and contact with the ice as you proceed upward. Holding the tool by its shaft near the base, swing overhead and plant the pick firmly but carefully in the ice. Do the same with the other tool and then work your feet upward. Snug wrist loops are essential when you are using the traction position for maintaining a good grip on the tools. They also let you "hang" by bending your knees and straightening your arms to rest.
Ice Tool Placement
- When placing your tools, look for depressions in the ice, which are stronger than outward bulges and resist fracturing a bit better. If you are following, look for holes left by your partner and place your tools in them.
- Just as with crampon placement, a single sure swing is far better than several taps or random chops at the ice. It saves energy and the ice surface. The right amount of force is important, too. Avoid swinging your tools too hard, or you will tire out your arms quickly. The more you can align your shoulder, wrist and axe when you swing, the more direct and secure the placement will be.
- To remove your tools as you climb past them, lift them out the way they went in. Move the pick back and forth in the same direction it went into the ice, and push up on the adze or hammer to help lift it out. Try not to wiggle the pick side to side as this can break it.
Dry Tooling
Ice routes are frequently mixed with rock. Dry tooling is using your ice tools as protection in cracks or other features on the rock. You can place the pick in a crack or torque the hammer head into a rock feature and then work your way up with your tools as you would if they were in ice. Some hammer-heads are even designed with different angles on each side to fit into various-size cracks like a cam or chock.
Protection and Anchors on Ice
Just as with rock climbing, you need to place protection as you go to protect yourself in case of a slip. Anchors allow you to belay your climbing partner and to rappel back down from a climb. This section covers some of the tools and methods that ice climbers use for protection.
Using Natural Anchors
Natural anchors can be used on an ice climb if you can find them. On waterfall ice, it is common to find sturdy ice columns around which you can put a runner. On mixed climbs you may find natural rock features such as horns to tie a runner around. Some ice climbers make use of cracks between ice and rock by tying off an ice screw with webbing, placing it in the crack and turning it 90° to create a chockstone.
Placing Ice screws
Ice screws must be placed in the ice securely, then clipped with a quickdraw to the rope, all while you are standing on front points and hanging from 1 ice tool. It's a tricky process for a beginner to master.
- You first need to clear away any rotten, soft ice or snow, until you reach good, solid ice. Use your pick to create a small hole in which to start the screw.
- It should go in at about a 10° angle uphill from the direction of expected pull.
- Choose a spot in the ice near your waist rather than above your head for better leverage while twisting it in. The pick of your free ice tool makes a good screwdriver if you are having a hard time with just your hand. Ice screws with rotating handles make the process much easier.
- As you work the screw in, clear away any ice that fractures around it. Keep turning until the eye or hanger is flush with the ice surface and pointing down-slope in the direction of pull.
- On very mushy or rotten ice, it's necessary to make a horizontal ledge in which to place the screw. Place it vertically in the ice well back from the edge.
- Keep screw placements around 2 feet apart.
- Back up sketchy screw placements with second screws linked with runners and carabiners.
Ice Pitons
Pound-in protection is useful in certain situations where screws would fracture the ice. Hook-style pitons can be placed in cracks, between ice features such as icicles or into old tool placement holes. Use the hammer on your ice tool to pound them in.
Abalakov V-Thread
Named after the Soviet climber who first devised it in the 1930s, the Abalakov V-thread anchor is simple in design, yet very strong. It's well suited to rappels or top-rope setups, assuming that the ice in which it is made is of good quality.
- To make the anchor, you need two 22cm ice screws, a length of 7ml perlon or half-inch webbing and a piece of wire to retrieve it.
- Insert the ice screws at a 10° angle uphill to the slope, and at about a 60° angle sideways. The idea is to make tunnels with the 2 screws that meet in the middle.
- Leave the first screw partway in place as a marker for placing the second one.
- Once you have the tunnel, thread the perlon or half-inch webbing using a wire coat hanger with a hook to retrieve it.
- Move the webbing or cord back and forth to smooth out the tunnel, then tie a knot to create your anchor. If using webbing, use a water knot. For perlon, use a triple fisherman's knot.
Ice Bollard
The ice bollard is another rappel anchor that is cut out of good-quality ice (i.e., hard ice with no cracks). It consists of a downward-pointing, teardrop-shaped trench in which your climbing rope rests, with an upper lip that prevents the rope from sliding off.
- To make an ice bollard, use your axe's pick to make the initial shape, then the adze for scooping out the trench.
- Cut out a trench at least 6" deep in the inverted teardrop shape, being careful not to crack the ice.
- The bollard should be from about 12" to 18" wide. (Bollards are also used in snow, but need to be much larger for the snow to hold.)
- At the top, make an undercut to keep the rope from slipping off. Be very careful not to crack the horn shape that you've created for the rope to rest on.
These techniques of ice climbing are just the basics. For more in-depth information and to gain competence, read available books or take a course from a reputable guide or club in your area.