Winter camping has its perks. There are fewer bugs and crowds while you experience the beauty and peacefulness of a pristine winter wonderland. But, if you're not prepared, it can also be cold and challenging. To set yourself up for a successful winter campout, you'll want to build on your knowledge of fair-weather camping while adjusting for the additional challenges of cold temperatures, snowy landscapes and unpredictable weather.
Here are the main things to think about when camping in winter:
- Tips for making camp in the snow: Pick a spot that's sheltered from the wind and free of avalanche danger, then prep your tent site by packing down the snow.
- Stay hydrated and eat lots of calories: Proper nutrition and hydration will help you stay warm. Make hot, nutritious breakfasts and dinners and enjoy quick snacks and lunches. Be sure to hydrate throughout the day.
- Use gear that's right for winter camping: You'll need a sturdy tent, a warm sleeping bag, two sleeping pads and a stove suitable for cold temperatures.
- Bring warmer clothing: Midweight base layers, fleece pants, a puffy coat, and a waterproof jacket and pants are standard. Don't forget accessories like warm socks, a hat, gloves and sunglasses.
- Prevent cold injuries: Frostbite and hypothermia are legitimate concerns while winter camping. Learn how to avoid them.
- Additional tips: Eating food, filling a bottle with hot water and doing jumping jacks are just a few tips for staying warm on a cold night.
Video: Winter Camping Tips
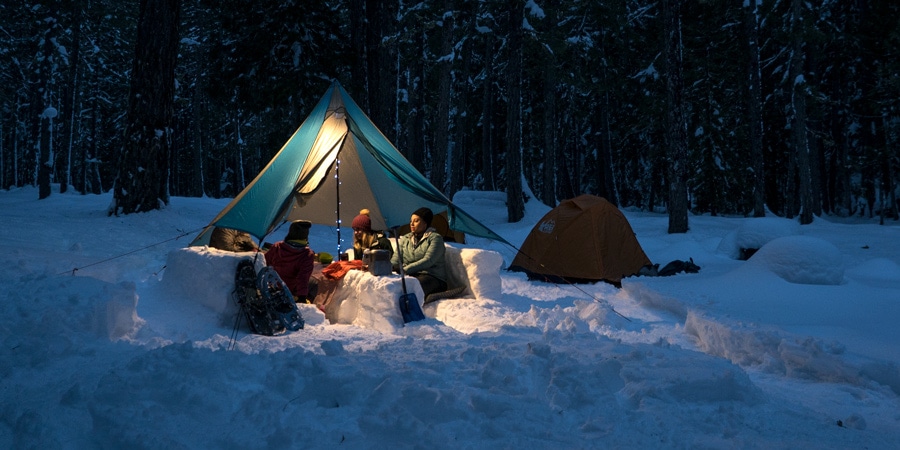
Making Camp in the Snow
Perhaps the biggest difference between summertime camping and winter camping is the possibility that you'll be camping on snow (assuming you live somewhere near where it snows). When you reach your destination for the day, rather than immediately unpacking, take some time to find the right camp spot. Relax, have a snack, put on some warm clothing layers and examine the area for these things:
- Wind protection: A natural wind block, like a group of trees or a hill, can make your experience more comfortable.
- Water source: Is there a good water source nearby, or will you need to melt snow?
- Avoid camping on vegetation: In patchy snow conditions, set up camp on the snow or an established campsite of bare ground.
- Avalanche risk: Make sure you're not on or below a slope that could slide.
- Hazard trees: Don't setup underneath unstable or damaged trees or limbs.
- Privacy: It's nice to have some distance between you and other campers.
- Where the sun will rise: A spot that offers exposure to sunrise will help you warm up faster.
- Landmarks: Keep an eye out for landmarks to help you find the camp in the dark or a snowstorm.
Setting Up a Tent on Snow
While it's possible to build a snow shelter, such as a quinzhee or igloo, most beginner snow campers will spend the night out in a tent (see the Essential Gear for Winter Camping section of this article for information on choosing a tent). If you won't be on snow, set up your tent just like you always do. If you will be on snow, here are some tips:
- Pack down the snow: Loose snow is more likely to be melted by your body and make it uncomfortable for sleeping. Before setting up your tent, walk around with your snowshoes or skis on your feet, or you can stomp around in your boots.
- Build a wall: If it's windy, build a snow wall around your tent if possible. If it's not feasible to do so, then dig out the snow a couple of feet down for your tent and vestibule. This helps to reduce wind impact. Don't completely seal up your tent though. It still needs to receive sufficient ventilation.
- Dig out your vestibule: You can dig out a bench underneath your tent's vestibule to create more space for stowing gear and to make it easier to get in and out of your tent.
- Use snow stakes: Standard tent stakes won't do much good in snow. Instead, bury stuff sacks filled with snow or use stakes designed for use in snow. Make sure your tent is staked out securely so it won't blow away if the wind picks up.
- Stay away from sharps: Keep any item that could tear your tent well away from your shelter and do not bring them inside. This includes items like ice axes, crampons and ski edges. Ripping your tent on a stormy winter day can be disastrous.
Your Winter Kitchen
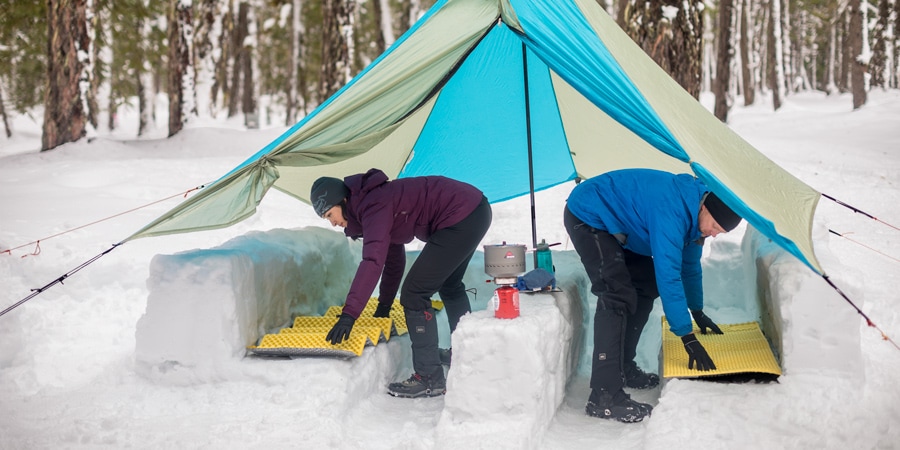
One of the joys of winter camping on snow is the ability to build your dream kitchen. Using your shovel, you can dig out and shape the snow to make a cooking surface, seats, tables and even a storage cabinet. Use your imagination to make it as elaborate as you'd like.
If you have a floorless tent or a tarp at home, you can bring either along to create a protected place to hang out while prepping food and eating meals. Set up the tent or tarp, then dig out the area below so you can stand up.
Leave No Trace (LNT)
Even in winter, it's important to follow Leave No Trace camping ethics. Here are some considerations for winter camping:
- Stay on deep snow cover when possible.
- Camp at least 200 feet from a trail, water sources and other campers.
- When camping on snow, pack out human waste and toilet paper in a plastic bag. At lower elevations, you can dig a hole in the dirt about 8 inches deep, bury feces and put a rock on top to deter animals from digging it up.
- If you're having a fire, used dead downed wood. Do not cut or break limbs off of live, dead or downed trees.
- Be respectful of wildlife and view them from a distance. Winter is a vulnerable time for animals.
Food and Drink Tips for Winter Camping
Your body uses a lot of energy when you're trekking through cold, snowy landscapes. It's important to eat and hydrate well before, during and after your activity so you can keep your energy up and stay warm.
Here are some food and water recommendations:
- Enjoy hot and simple meals: A hot meal while winter camping is especially gratifying, but try to keep your meals simple so you're not stuck cleaning lots of dishes in the cold. Consider calorie-dense foods that don't take much time to cook and look for one-pot options. Freeze-dried entrees and breakfast foods are also good choices. Learn more about meal planning.
- Take short lunch breaks: For lunch, simple sandwiches or quick-grab snacks and energy foods that provide protein, fats and carbohydrates are good. Try not to stop for long lunch breaks where you cool down. Instead, take short breaks to snack on food, or simply nibble while you're moving.
- Store food securely: Bears are typically in a deep slumber during wintertime, but there are other critters that will happily snack on your food if you leave it accessible. Stow your food securely in your backpack or hang it from a tree using a stuff sack and rope. Some areas may have regulations for food storage; familiarize yourself with those before leaving home.
- Remember to drink: Stopping to drink water when it's cold out can feel like a major inconvenience, and you may not feel especially thirsty like you do on a hot summer day. To stay properly hydrated, it's important to make yourself sip water regularly throughout the day. At camp, making hot drinks, like herbal tea or hot chocolate, or sipping on soup are good ways to warm up and rehydrate.
- Use bottles: Most winter campers choose to leave their hydration reservoirs at home and take water bottles instead (the tubes on reservoirs can easily freeze solid, thereby cutting off your water supply). To keep your water handy, you can use an insulated water bottle cover that attaches to the outside of your pack.
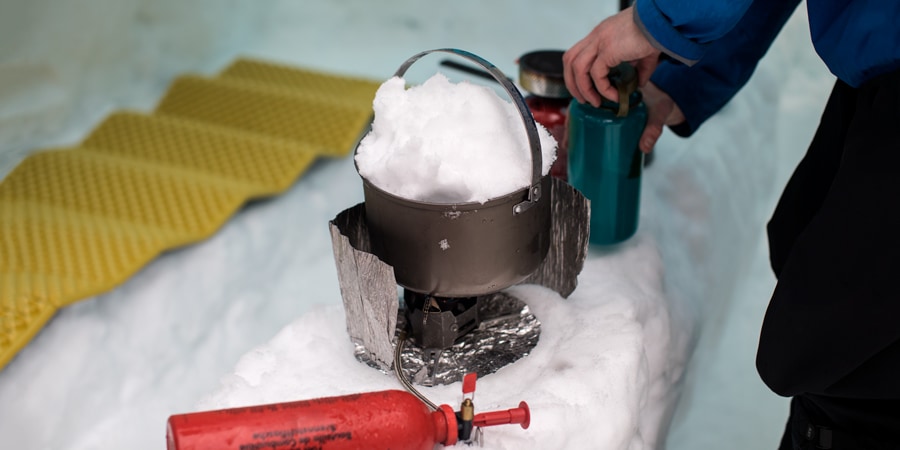
Melting snow: During winter, many creeks and lakes are frozen solid or buried beneath feet of snow, which means you'll likely need to melt snow for drinking water.
To melt snow:
- Designate an area for gathering clean, white snow.
- Light your stove.
- Put a little water in your pot, then add snow (adding water helps prevent scorching the snow, which can create an off-taste).
- As the snow melts, add more.
It's best to fill all your bottles before you turn in for the night so they're ready to go for the next day.
Essential Gear for Winter Camping
The simple rule of winter camping is to stay dry and warm. Having the right gear for your trip can be critical to your enjoyment when you're out in the cold for extended periods.
Winter Camping Gear
The requisite gear for winter camping is similar to what you'd take backpacking but with an emphasis on warmth and toughness. Here are some details on the key items:
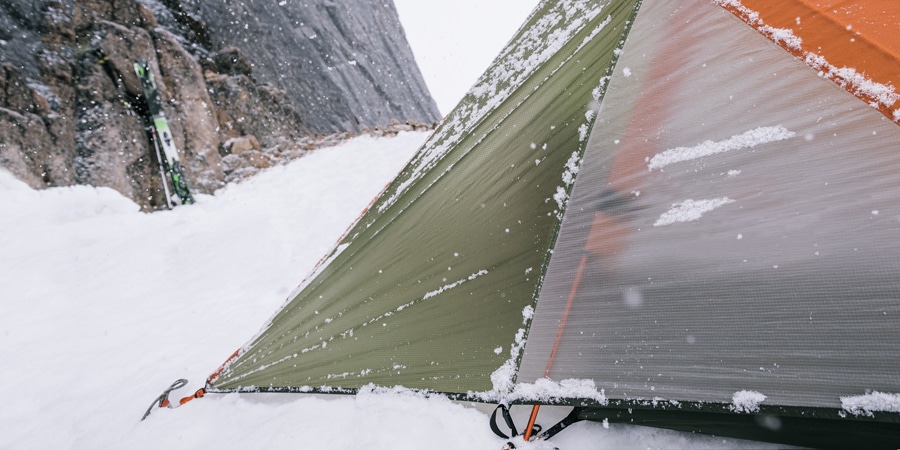
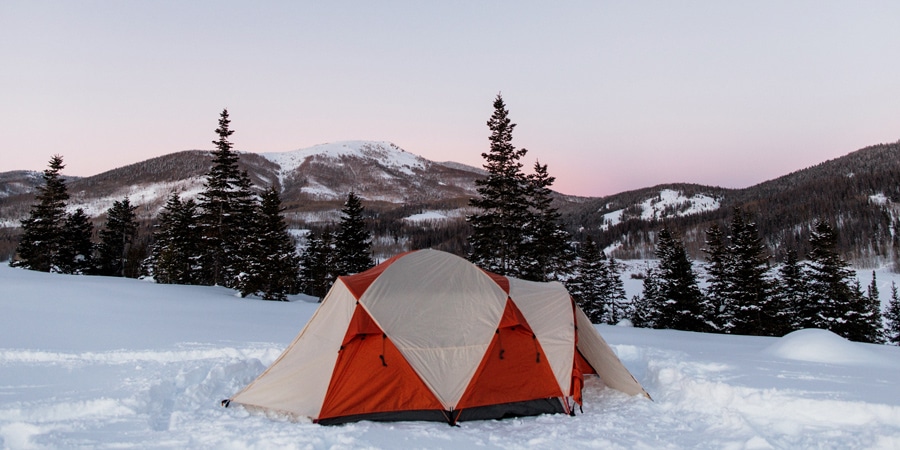
Tent: It's important to have a shelter that's able to handle winter weather. When choosing a tent for winter camping, keep these things in mind:
- A typical 3-season backpacking tent can work if you're making camp below tree line and you're not anticipating especially stormy weather.
- For high winds and heavy snowfall, a 4-season tent is recommended. 4-season tents have sturdier poles and heavier fabrics than 3-season tents so they can withstand powerful gusts of wind and heavy snow loads. They also have less mesh and the rainflys extend close to the ground to keep swirling snow from getting inside.
- You'll want some extra space. It's a good idea to get a tent that has room for one more person than will be sleeping in it (eg. a 3-person tent for two people.) This gives you room to stow gear inside away from the elements.
Learn more about choosing a tent in our article, Backpacking Tents: How to Choose.
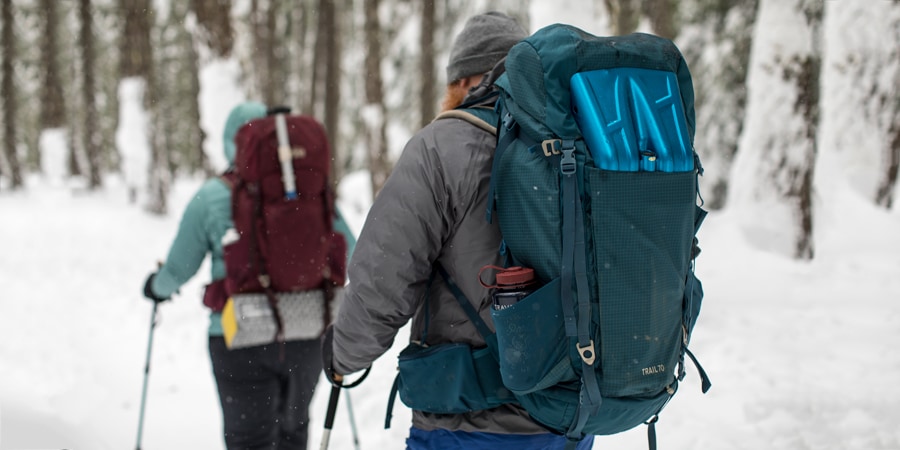
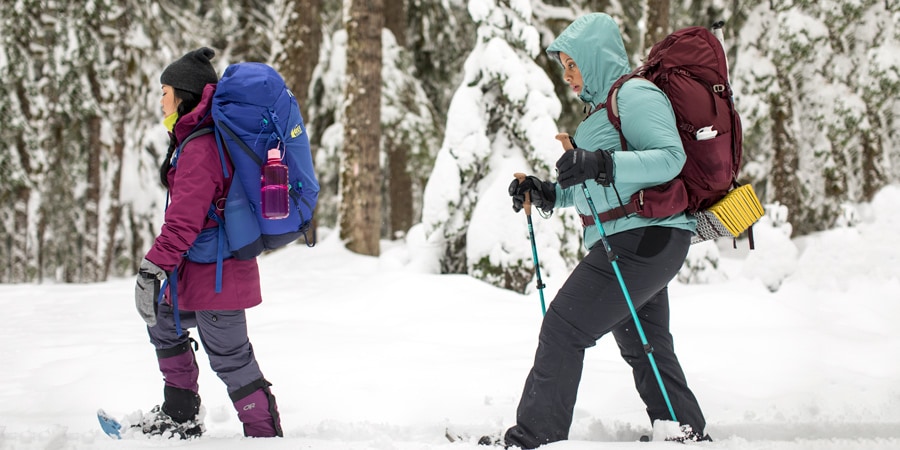
Backpack: Winter camping and backpacking requires extra gear and warmer, bulkier clothing, so you may need to use a larger pack than you typical do in the summertime. Pack as lightly as you can, but always make sure you're prepared for winter conditions. Rough guidelines for a 2- to 4-day trip:
- Lightweight: minimum 65-liter (3,967 cubic inch) pack.
- Deluxe: minimum 80-liter (4,882 cubic inch) pack.
If you plan on carrying skis or snowshoes, make sure your pack has lash points or is otherwise able to secure these large items.
For helping choosing the right one, see How to Choose a Backpack.
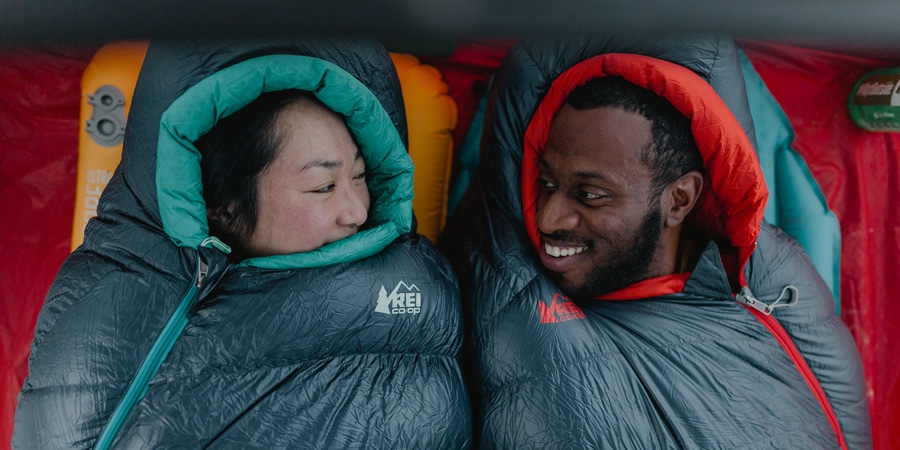
Sleeping Bag: To ensure comfort on cold nights, it's a good idea to use a bag that's rated at least 10°F lower than the coldest temperature you expect to encounter. You can always vent the bag if you get too warm.
When choosing a sleeping bag, consider these things:
- Cold-weather bags are supplied with generous amounts of goose down or synthetic insulation. Down is a popular choice due to its superior warmth-to-weight ratio. Just make sure to keep it dry (when wet, down loses much of its insulating ability).
- Winter bags are distinguished by their draft tubes behind the zippers, draft collars above the shoulders and hoods to help keep the heat in the bag.
- If you're not sure your sleeping bag is warm enough, you can add a sleeping bag liner. These add extra warmth while also minimizing wear and keeping your bag cleaner. The extra layer can add about 5 - 25°F of warmth.
To learn more about sleeping bags, read How to Choose Sleeping Bags for Backpacking.

Sleeping Pad: A sleeping pad provides essential insulation and cushioning. Here's some helpful information about sleeping pads:
- Use two pads: For winter camping, use two full-length pads to keep from losing body heat on snowy surfaces. Use a closed-cell foam pad next to the ground and a self-inflating pad on top to get the best insulation from the cold ground. The foam pad also serves as insurance in case the self-inflating pad gets punctured.
- Consider R-value: Pads are rated by R-value, the measurement of insulation, ranging from 1.0 and 8.0. The higher the R-value, the better it insulates. Pads designed for all-season or winter use usually have an R-value of about 4.0 or higher.
Read How to Choose Sleeping Pads to learn more.
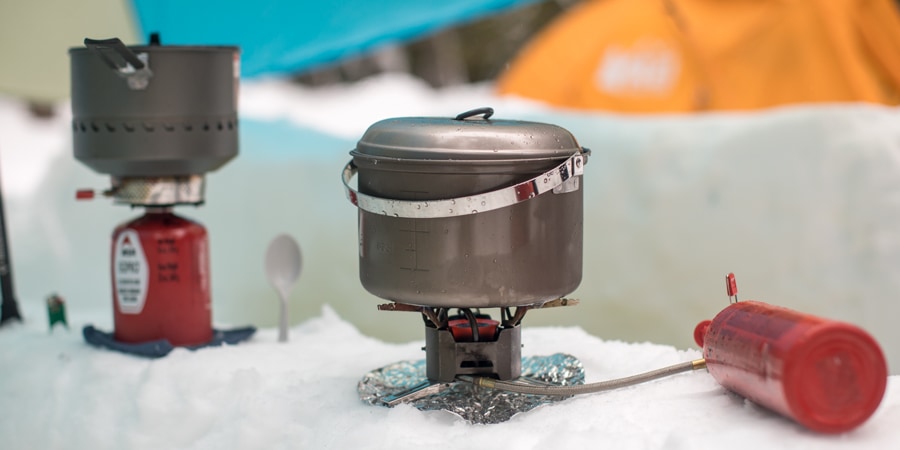
Backpacking Stove: Most liquid-fuel stoves and some canister stoves are good options for winter camping.
- Liquid-fuel stoves run on white gas, which burns hot and clean and performs well in below-freezing temperatures. But, they tend to be heavier and slower to boil than canister stoves, and you typically have to prime them before you can cook. Some multi-fuel stoves can also run on unleaded auto gasoline, kerosene, jet fuel and/or diesel, making them a great choice for international travel.
- Canister stoves are lightweight, compact and quick to boil, but they don't all work well in cold weather. If you decide you want to use a canister stove for winter camping, make sure it has a built-in pressure regulator. In cold weather, canisters can depressurize and produce a weak flame. A pressure regulator helps combat this. Also, keeping your fuel canister warm by stowing it in your sleeping bag at night and in a jacket pocket when you're around camp and getting ready to cook can help stove performance.
Stove tips:
- Bring a backup: You may want to bring a backup stove, just in case your primary stove malfunctions. Having a second stove can also speed up the group-cooking process.
- Bring extra fuel: Keep in mind that it takes extra fuel to melt snow for drinking water. And, you'll use more fuel at higher elevations.
- Make a base for your stove: Using a piece of plywood that's sized to fit your stove as a stove base can improve performance. If you're using a liquid-fuel stove or a canister stove with a remote burner, the base will prevent your stove from sinking into the snow and becoming unstable as it heats up. If you're using a stove that sits on the fuel canister, wrap the base in tinfoil to reflect some heat back up and help keep the canister warm.
- Put your fuel canister in water: Another way to keep a fuel canister from getting too cold is to set it in water. This will help keep the temperature above freezing. To do so, bring a flat-bottomed bowl just big enough to fit a canister, pour a little water in and set the canister inside.
See How to Choose a Backpacking Stove for help with selecting the right one.
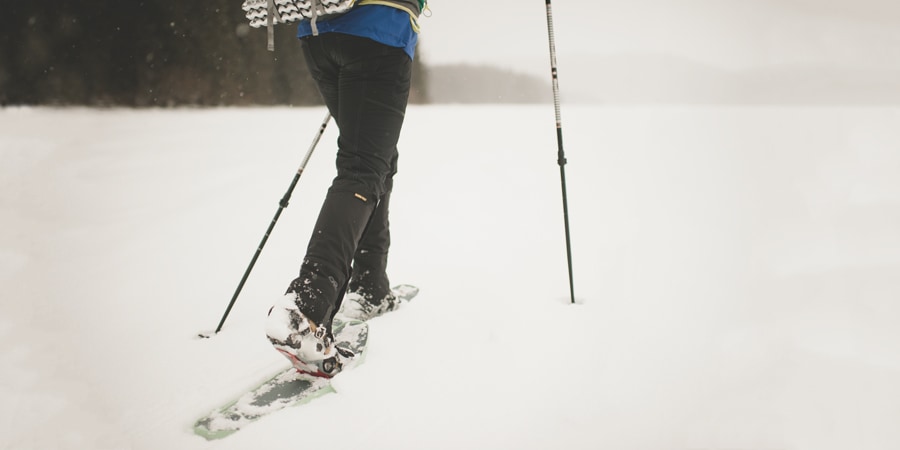
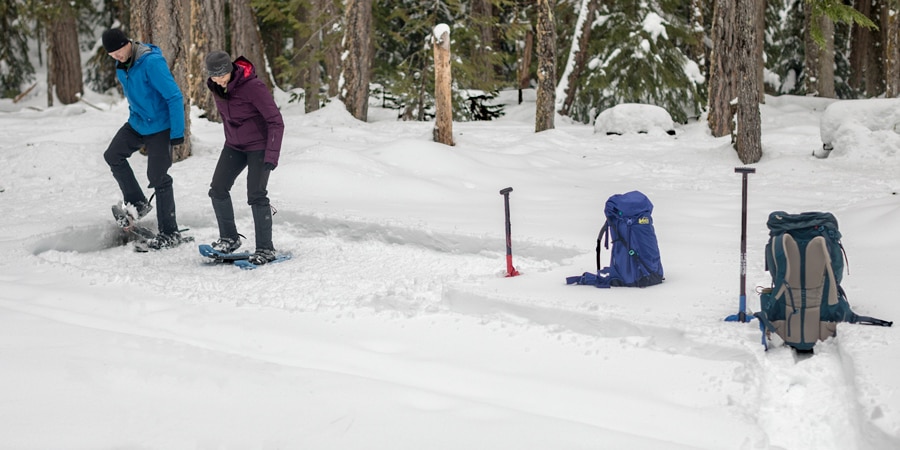
Snowshoes, skis or a snowboard: If there's only a few inches of snow on the ground, hiking is a perfectly fine way to get around (if the trails are slick, consider putting winter traction devices or crampons on your boots.) But, if you're headed to an area that receives lots of snow, you'll need some form of flotation to make traveling easier. These are your main options:
- Snowshoes: If you're not a skier or snowboarder, then snowshoes are likely your best bet. Snowshoeing is a lot like hiking, so it's easy to get the hang of. Learn more in our Beginner's Guide to Snowshoeing.
- Skis: For mellow terrain, cross-country touring skis work well. For steeper slopes, bring your backcountry skis.
- Snowboard: You can use a splitboard that separates in two lengthwise, essentially becoming skis for climbing hills (at the top of the hill, you put the board back together and snowboard down). Or, you can carry a standard snowboard on your backpack and use snowshoes to travel uphill.
Learn more about backcountry travel in winter.
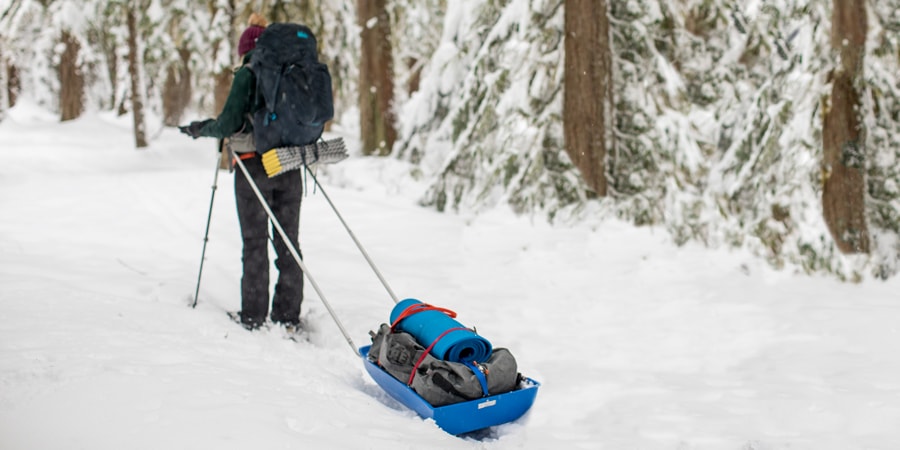
Sled: For longer trips and expeditions, some winter campers pull a sled. A sled helps you to reduce weight on your back and lets you carry more gear. A sled is not practical for all terrain (steep slopes and narrow trails can be difficult), so research your route and trail conditions beforehand. Learn how to make your own sled for winter camping here.
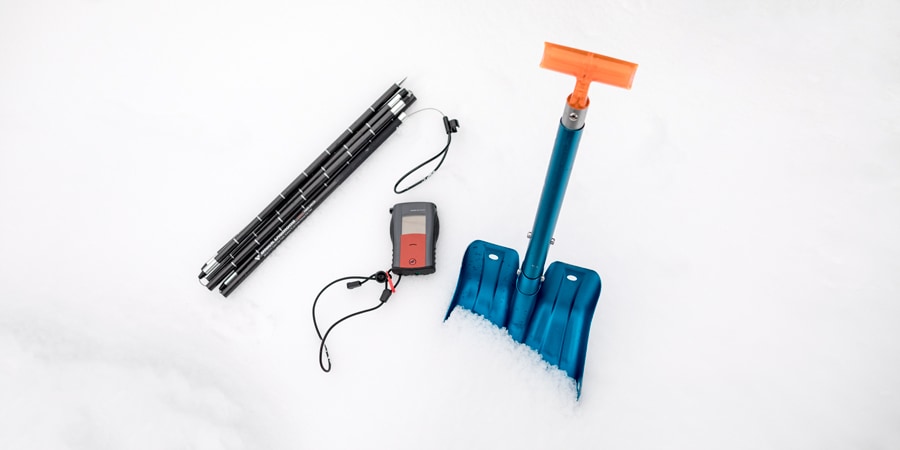
Avalanche Safety Equipment: If you will be traveling in avalanche terrain, it's essential that you carry three items and know how to use them:
- Avalanche transceiver: Avalanche transceivers emit a signal that other transceivers can pick up. When someone is buried in an avalanche, rescuers use their transceivers to search for the victim. It's critical that you understand how to use one before heading out into avalanche terrain. This requires competent instruction and practice. For details, see How to Choose Avalanche Transceivers.
- Probe: A probe is a collapsible pole with depth markings (usually up to 10 feet long). Sections can be quickly assembled after an avalanche to probe into the snow and help find victims.
- Snow shovel: A shovel is essential for digging out avalanche victims. It's also an important tool that can be used for leveling a tent site, digging a snow shelter or getting fresh snow to melt for drinking water.
Note: If you'll be traveling across a snowy landscape you must be able to identify and avoid avalanche terrain. Before you go, take an Avalanche Awareness class, offered for free in many locations, including some REI stores (look for an REI Outdoor School Avalanche Awareness class in your area). Also, check the local avalanche forecast so you know what potential hazards exist. Keep in mind that avalanche forecasts may be general and not accurate for specific areas. To learn more, check out our Expert Advice series of articles, starting with Avalanche Basics.
The Ten Essentials
As with every backcountry trip, you and your fellow campers need to be equipped with the Ten Essentials. Double-check before you leave home to make sure you're on the same page when it comes to who is bring what. To learn more, see our article and checklist for the Ten Essentials.
What to Wear Winter Camping
Having the right clothing and managing layers appropriately are key to your comfort while winter camping. Be sure to read Layering Basics and How to Dress in Cold Weather, and then look for these three basic layers and accessories:
Base layer: This is your underwear layer that goes next to skin. For winter camping, midweight long underwear is a good choice for all-around use. Lightweight is best for mild conditions and heavyweight for below-freezing temps. Look for fabrics like polyester or wool that wick perspiration away from your skin and dry quickly. Learn more in How to Choose Base Layers.
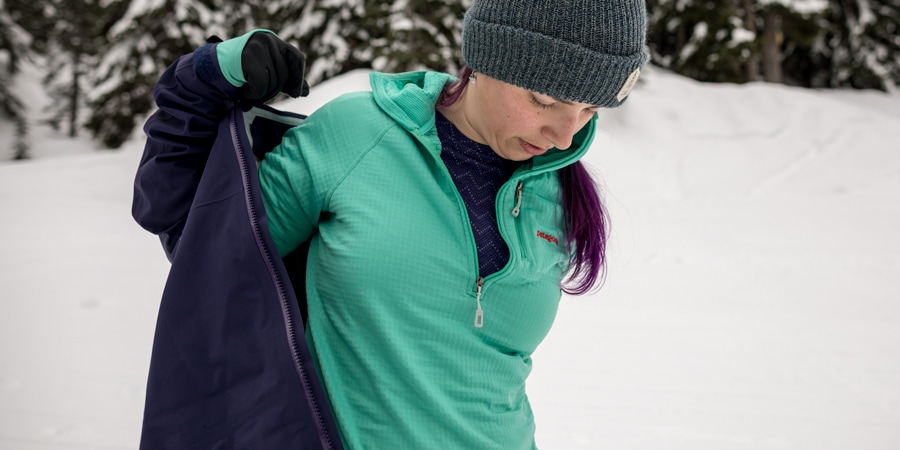
Middle layer: This is your insulating layer that is primarily designed to help you retain body heat. In general, thicker (or puffier) equals warmer. For your upper body, most winter campers like to have a puffy down or synthetic insulated jacket. If you prefer fleece, make sure your jacket is heavyweight fleece. For your legs, fleece pants or heavyweight long underwear are good options, Learn more about insulation options in Down vs. Synthetic: Which Insulation is Right for You?
Outer layer: Also called your shell layer, this is your waterproof/breathable defense against snow, sleet, rain and wind. In winter, it is important to have a fully waterproof jacket and pants rather than merely water resistant because if moisture penetrates your inner layers, you can get seriously chilled. However, these garments also need to be breathable so that perspiration wicked by your base layer can escape. Read more about shells in our article, How to Choose Rainwear.
Accessories: These simple accessories can provide lots of comfort on cold days:
- Winter hat: A basic wool or synthetic beanie had will work well. Make sure your hat covers your ears. If your face gets cold, consider a facemask or balaclava.
- Gloves and mittens: Fleece gloves provide basic warmth, but insulated gloves with waterproof/breathable shells are better. Mittens let your fingers share warmth, but the you sacrifice a bit of dexterity. Whatever you choose, it's wise to take an extra pair along in case they get wet.
- Goggles and glasses: Always protect your eyes from sun and wind. If you anticipate bright, sunny days, you'll want glasses or goggles with dark lenses and a visible light transmission (VLT) of about 0 - 19%. For cloudy weather, light-colored lenses, such as yellow, gold, amber or rose, help enhance contrast in tricky, flat-light conditions. A VLT of about 20 - 40%, or even higher, can be good in overcast conditions.
- Socks: Wear non-cotton socks. The appropriate thickness of your socks is determined by your boot fit. An extra-thick sock will not keep your feet warm if it makes your boots too tight. Take extras.
Footwear
If there's only a few inches of snow on the ground, you can use traditional hiking boots. But, in deeper snow, you'll appreciate having winter or mountaineering boots that are waterproof and insulating. Using gaiters will keep snow out of your boots and they will add a bit of warmth.
Skiing and snowboarding, of course, require their own boots that are compatible with the bindings.
Preventing Cold Injuries While Winter Camping
Frostbite (the freezing of tissue) and hypothermia (the result of your body's temperature dropping below normal) are real concerns while winter camping. To prevent them, you need to actively take care of yourself and your hiking partners. Here are a few ways:
- Stay warm, don't get warm: By dressing appropriately, you can maintain a comfortable temperature, which is much simpler than trying to warm up after getting too cold.
- Don't try to tough it out: If you feel your fingers or toes getting cold, stop and take the time to check on them and warm them up. Placing cold fingers in your armpits or cold toes on a partner's warm belly are good ways to warm up. Using hand warmer and toe warmer packets is also effective.
- Keep an eye on your friends: Regularly ask your friends how they're doing and if you see pale spots on your friend's face or they're starting to get clumsy on the trail, make them stop and cover up exposed skin or add a warm insulating layer.
To learn more about frostbite and hypothermia, including how recognize symptoms and treatment options, see the Cold-Related Injuries and Illnesses section of our Cold-Weather Hiking Tips article.
Tips for Winter Camping
Eat food for warmth: Your body generates heat as it digests food, so if you're feeling cold try eating some food. Before you go to bed, have a little snack to keep your metabolism going and keep a candy bar nearby if you get cold in the middle of the night.
Add even more ground insulation: Put your waterproof layers between your two sleeping pads to add a little extra insulation from the cold ground.
Use your foam pad for more than sleeping: Use your foam sleeping pad to sit or stand on while you're cooking. It helps you stay a little warmer and drier.
Fill floor space in your tent: A bunch of empty floor space inside your tent will make it hard to warm up the interior space. Bring your backpack and other gear inside (avoid sharp items that could rip your tent, like crampons and axes) and place it around you on the floor of your tent to act as insulation against the cold ground.
Exercise before bed: Crawling into your sleeping bag cold is a sure way to shiver all night long. Do 50 jumping jacks, jog in place or chase your friends around camp. When your heart is pumping and you're feeling warm, get in your sleeping bag and zip it up tight.
Go pee when you need to: By emptying your bladder, your body needs to use a little less energy to stay warm. If the idea of getting out of your toasty warm sleeping bag in the middle of the night seems unbearable, use a pee bottle. Women can use a pee funnel to go into the bottle.
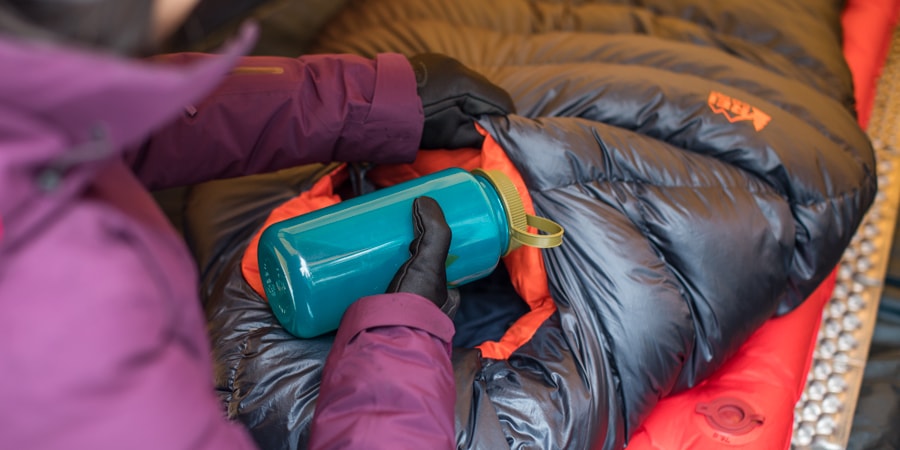
Fill a bottle with hot water: Create a little heater that will last long into the night by boiling a liter of water and pouring it into your hard-plastic water bottle (don't use a metal bottle—it will get too hot). Screw the lid on tight, makes sure it doesn't leak and toss it in your sleeping bag. Holding the bottle close to your tummy or between your legs will really heat you up, but be careful—the bottle will initially be quite hot.
Keep your boots inside: Bringing your boots inside your tent will keep them a few degrees warmer than if you leave them outside. This will make them a bit more pleasant to put on in the morning. If your boots have removable liners, keep them warm at night by putting them in your sleeping bag. The same is true for socks and boot insoles.
Sleep in clean clothes: Over time, body oils, sweat and dirt can rob your sleeping bag of its insulating power. Change into clean long underwear and socks for sleep.
Use your body as a dryer: If your gloves or socks get wet, put them on top of your base layer on your shoulders, in your armpits or tucked into your pants' waistband where your body heat will dry them.
Stow your bottles upside down: Water freezes from the top down, so by stowing bottles upside down, the bottle tops are less likely to freeze shut. Just make sure your bottles lids are screwed on correctly and won't leak.
Start out with your batteries fully charged: Winter nights are long, so make sure your headlamp, GPS and cell phone batteries are new or fully charged before an excursion and always take extras. Lithium batteries perform well in cold weather, but they can overpower some devices like headlamps (check your product's manual for compatibility). Alkaline batteries should work in any device, but they drain at a faster rate.
Keep electronics warm: Cold temps can zap battery power. When not in use, stow things like your headlamp, cell phone, GPS and extra batteries in your sleeping bag or a jacket pocket close to your body.
Secure your camp: Before you leave your camp for the day or go to sleep at night, make sure that anything that could easily be blown away or buried by snow is put away and secure. Prop your skis or snowshoes upright so they won't disappear under a blanket of snow and make sure things like your stove, shovel and water bottles are put away where you can find them.
Remember: Safety is your responsibility. No internet article or video can replace proper instruction and experience—this article is intended solely as supplemental information. Be sure you're practiced in proper techniques and safety requirements before you engage in any outdoors activity.