


Greenfield Alloy Kickstand KS2 - Standard Top Plate
The Greenfield Alloy Kickstand KS2 with standard top plate keeps a bike standing on its own 2 wheels—no more looking for a parking meter or tree to lean it against!
- 285 mm length works best for 26 in. wheeled bikes, but can be cut to fit smaller bikes
- Nonporous, noncorrosive casted metal alloy is lightweight and strong for confident support;
- Dual-spring pressure plate with snap action mechanism
- Calibrated stem
- Nonslip clamping surface
- Hardened steel pivot pin
- Zinc-plated screw
Made in USA.
View all Greenfield Kickstands| Best Use | Cycling |
|---|---|
| Material(s) | Alloy |
| Weight | 266 grams |
Write a Review
Adding a review will require a valid email for verification
Customer Images


Most Helpful Favorable Review
Most Helpful Critical Review
Not Plug-and-Play w/ CTY 1.1, but adequate
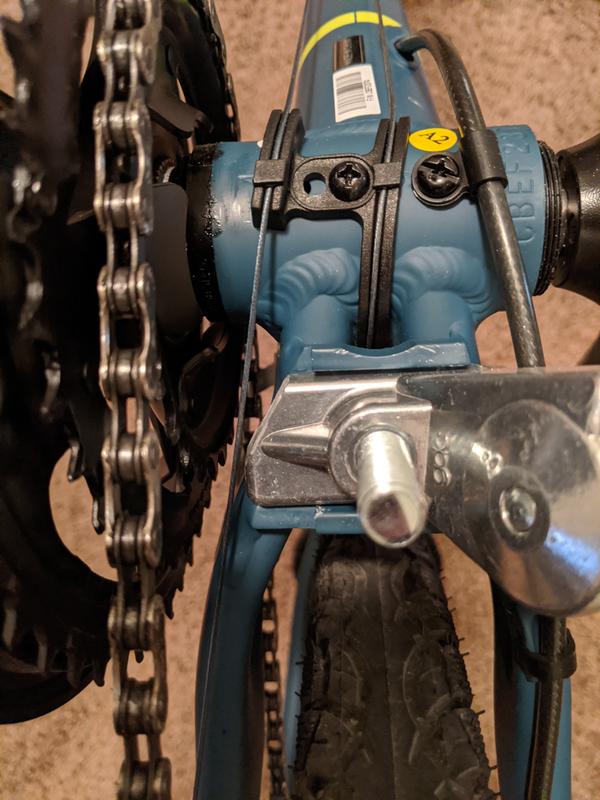
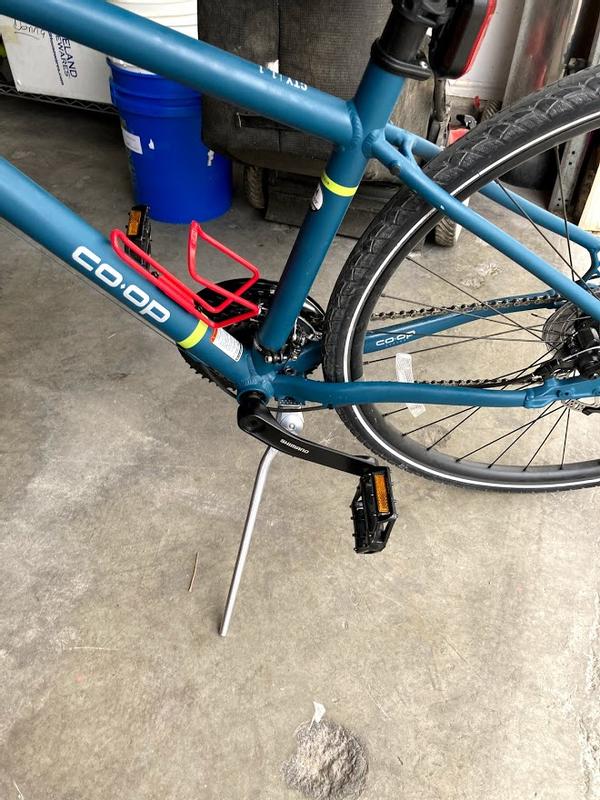
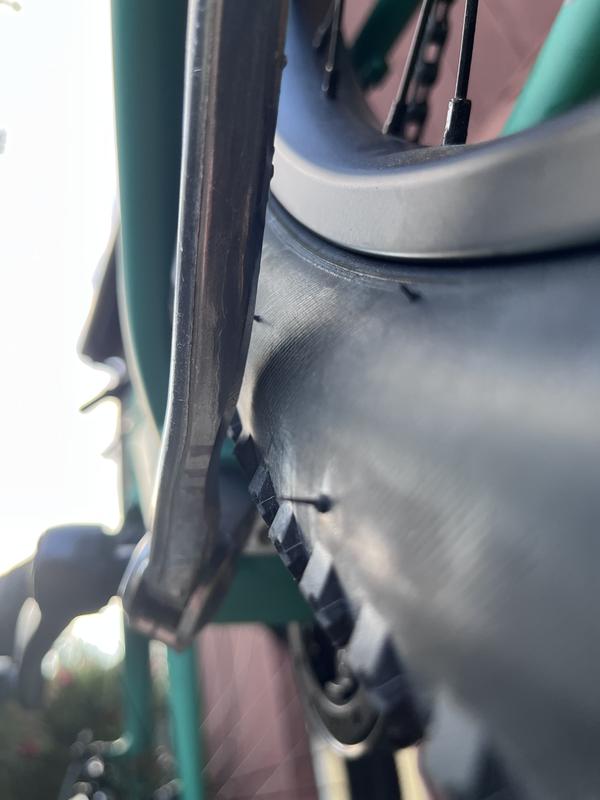
I purchased this kickstand with a Co-Op CTY 1.1 bicycle based on the affirmative answer provided by REI to another customer's question about its compatibility with that bike. While I imagine it is compatible with just about any bike with kickstand plate, attaching it to the CTY 1.1 required some modifications to the kickstand. First, there was insufficient clearance between the frame and the supplied hex bolt to tighten it with a socket. To remedy this, I used a Dremel tool to cut a slot in the top of the bolt so that it could be tightened with a flat screwdriver. (As another reviewer points out, one could also find an internal hex (Allen) bolt to replace the one supplied.) Second, one corner of the plate/bracket at the top of the kickstand protruded from the frame when attached and impinged upon the rear shifter cable. Again, I used the Dremel tool to remove the offending protuberance. Additionally, the kickstand needed to be shortened (by the same means) for use with the medium-sized CTY 1.1. DIY adventure notwithstanding, this seems to be a sturdy, well-made kickstand for the price.
A few styles and a few uses
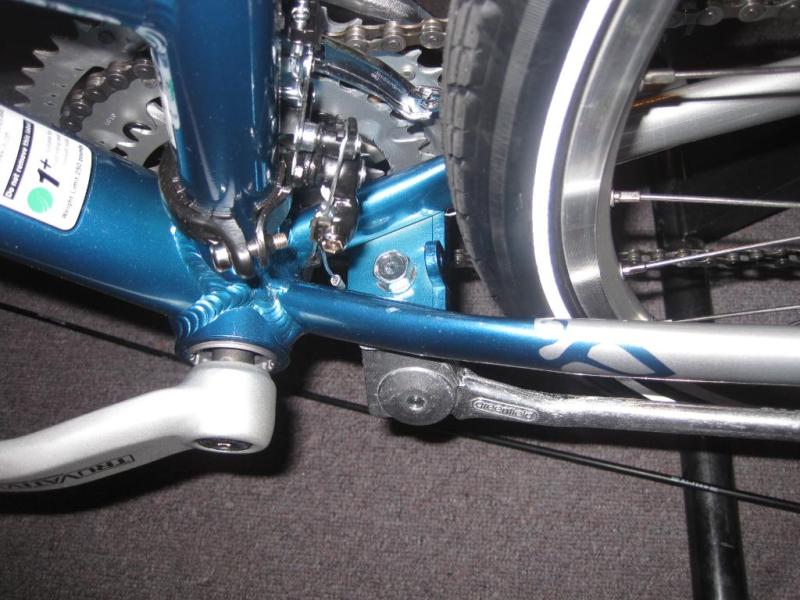
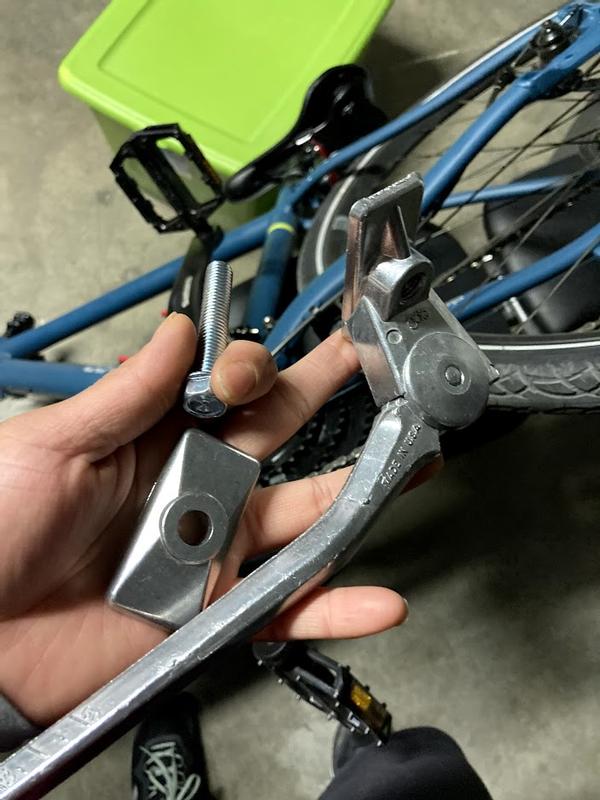
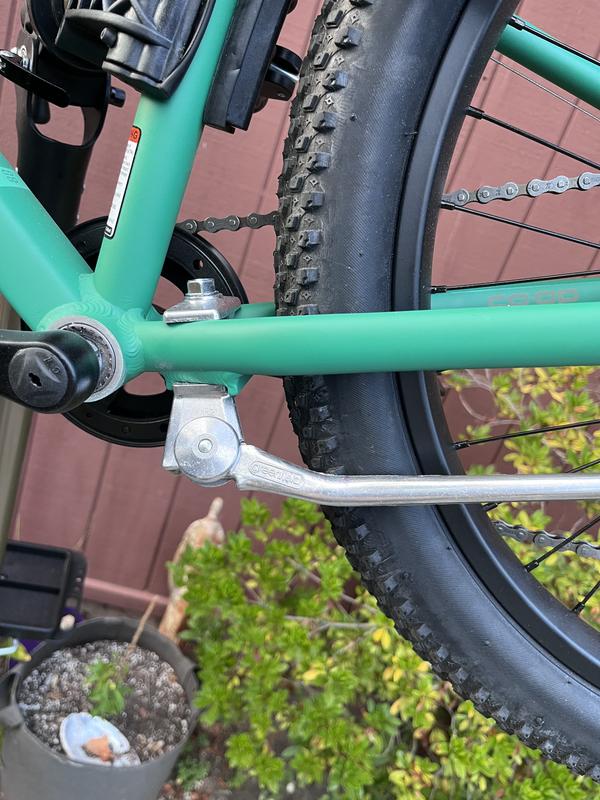
Be aware that there are two main styles: 1. has a Allen bolt of smaller diameter and is threaded from under the bike up. It comes with a pan washer (non locking). 2. has a hex bolt and it is threaded from above. The bolt has grooves under its head so no need for a locking washer. There are also 2 lengths available from Greenfield: 285 and 305, and two colors: silver and black. I found at REI only the silver and only on 285mm, but that was what I wanted/needed anyway. I'm sure you can get any of the others or the rubber boot if you special order them in store. BTW I have no need for the rubber boot and happy it did not come with it - you may disagree with me here. The first stand I bought years ago, also from REI, was for a K2 20" kids bike. That required trimming as it was too long - easy to do even with hand tools. It is still working and looking fine and never needed any adjustments. The second one I bought for a Novara Fiona (bike size XS) that has 700 wheels and a classic woman frame shape. The nice thing is that Fiona has the frame already provisioned for such a stand with a horizontal shallow but wide U channel welded upside down under the bike in which the stand top fits (see my first picture) and the exact right size hole for the stand screw to pass through even if using #2 that has a larger bolt (see my second picture). Any of the two stand styles will work but the perfect fit for this bike is with the #2 style. For this bike (and similar) you will have no need for the upper part of the stand (that would go on the top of the horizontal bike stays). All you need is the stand itself and the bolt. The bolt even has groves under its head so you do not need a locking washer. There is no need to trim the stand for this bike. If you are the kind of guy I am and want it to be absolutely perfect for this bike, then you may want to trim the bolt and apply some Zinc paint on the cut (see my first picture) as the bolt is Zinc plated. But you "normal" people can skip this - nothing to worry about. If your bike does not have such hardware provisioned then you will use all the pieces that came with the stand and the bolt length is just right. The only cons I have with this stand is the missing documentation and the many ways this very good product can be used. They have some printed on the plastic packaging but it is very little. Instead they should have just printed a web address and host a web page with all the info, and let people post how they use their product. All in all this is a very good product at a very good price.
got this for my Co-op Cycles CTY 1.1 Bike
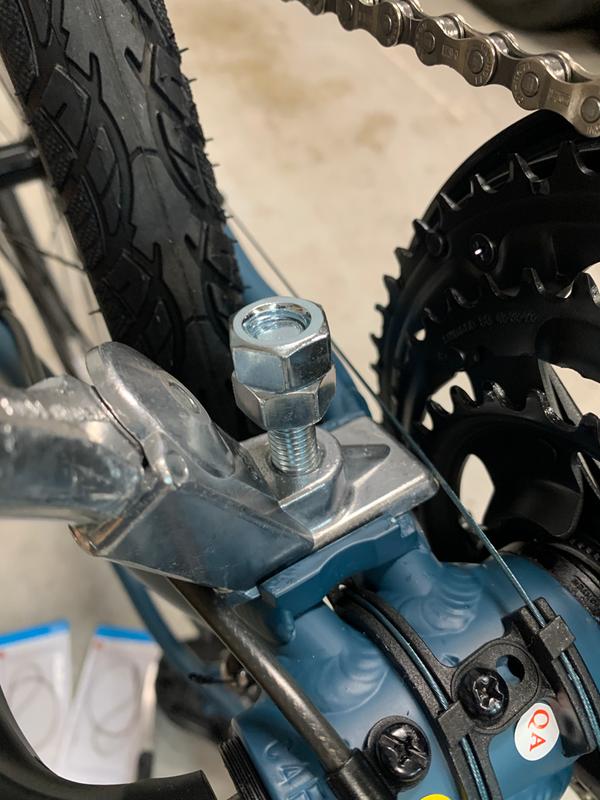
The top piece and screw that came in my bike wouldn't fit with my bike. I had to get a m10 socket cap screw, and a washer to make it work. Once I changed those parts it worked for me.
Decent Kick Stand, Requires some improvements
This is a pretty good kickstand for the price and USA Made too. It's actually the second one I own and fits my CTY 1.1. Pro's is that it get's the job done, sturdy, and the engages/disengages are really crisp, but it does have several cons and I'm only able to use it after spending about $3 on some modifications so buyer beware. Overall, I decided to keep it since it is a good stand and is a lot more affordable than some other options even after buying extra parts. First is the lock washer. Although one is pictured, it actually doesn't come with one. I went to REI and they gave me one for free since it is pictured. The Bike Tech's working there actually knew that the part was missing so they instantly knew the exact size for what I needed. Second is the bolt, It's a little too long and you can't screw it in on the CTY 1.1. since the frame blocks you. As other reviews have stated, replacing it with a M10 x 1.5 40mm socket bolt is ideal and what I ended up doing. Third is the stand point. It's really sharp and can sink into grass or damage hard floors easily. I ended up using an extra trekking pole foot to cover it and it fit perfectly (as pictured). Forth is that when you disengage it, it has give and kind of moves back and forth a little, so if you don't place it right, you can actually end up taking out some spokes on your bike rim so make sure you screw it in right the first time.
Different way tightening the bolt for co-op bike
Instead of drilling out a slit for tightening the bolt you can put two 7/16 nuts at the end and tighten the second counterclockwise. Remove the nuts once it’s done.
Fine product; needs more documentation
I use this on a 26" Trek 730. Fit fine out of the bag; no cutting required. Documentation is lacking. I would have included this info: *Weight: 230 g *Wrench size used to install: 14 mm *Installation tips: **Watch out for derailleur cable and don't tighten the mounting plate on it. **Use thread locking glue (eg by Loctite) because the kit doesn't include a lockwasher. Enjoy!
works well for time being
My wife wanted a kickstand so I got this one for her -- it's not expensive and just like the ones I used as a kid. However, it bugged me that it didn't come with a lockwasher. I could see it shaking loose after repeated use -- it makes a 'boinggg' sound when kicking it up (or down). Then I saw the picture online and it shows a lockwasher. So perhaps mine is just missing it. I'll have to pick one up at the hardware store. When I matched it up before mounting it, I noticed it rubbed against one of the derailleur wires and the bottom ridge prevented it from being seated in the best place. 5 minutes with a vise and a file took care of both issues. I think it will work fine. It is sure to scratch up the finish on the bottom even with the thin rubber layer I put there.
As simple as this
Toke two minutes to check, install and voila ... my mountain bike stand upright!
You’ll need an angle grinder
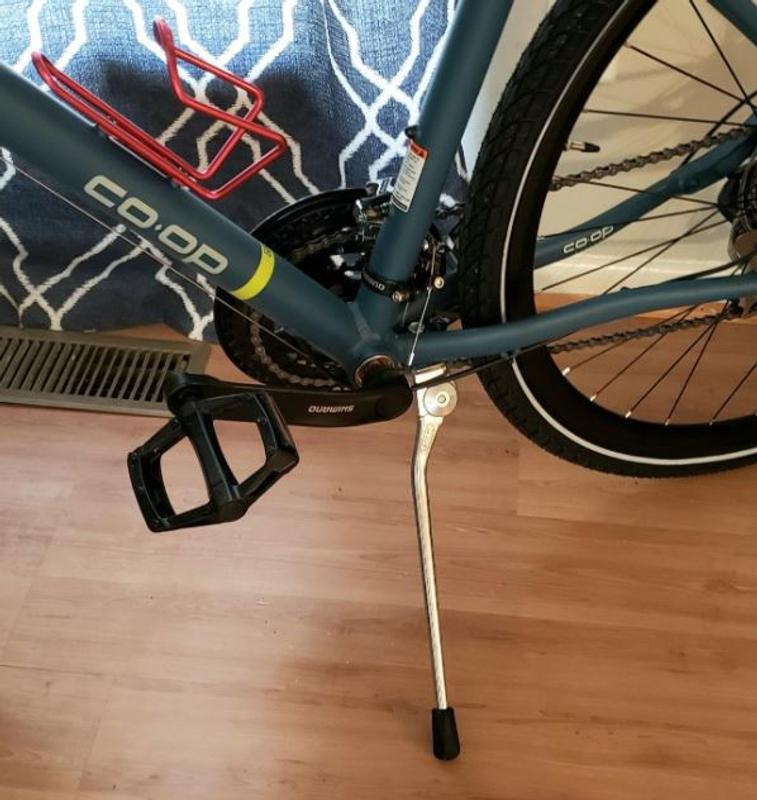
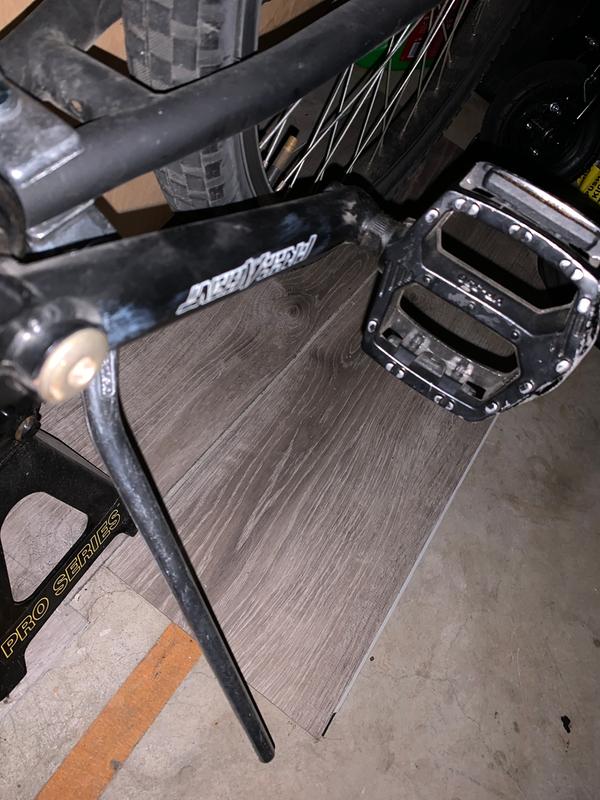
Purchased this to go with my son’s new Co op Rev 24 bicycle. The mounting bracket fits fine, but the stand will need shortening (I chopped with an angle grinder cutting wheel). But the wide tires will run on the stand. I had to throw the flap disc on the grinder to remove material from the aluminum stand so that tires wouldn’t rub.
Kickstand Easy to Install
Needed to install a kickstand on my wife's new bike. This one was easy to install and it works great. The trick is to saw off just the right amount so that the bike leans on it just right. The instructions gave the tip to raise the bike by putting something under the wheels. When the bike leans just right on the kickstand, you know how much of the stand to cut off, because it is however much you needed to raise the bike. So measure your stack of newspaper (or whatever you use) and cut that much off.