What started thousands of years ago as an essential mode of winter transportation has evolved into a popular recreational activity. But if you've never done it before, you might ask, why go snowshoeing? Here are a few reasons:
It's great winter exercise: If you're looking for a way to stay in shape even when the snow falls, snowshoeing is an excellent low-impact aerobic exercise. It lets you extend your hiking and running season and lets you enjoy solitude in areas that might be crowded in summer.
It's a great social activity: All ages and ability levels can enjoy the sport together.
It's inexpensive: If gear and lift-ticket prices for skiing and snowboarding give you pause, you'll be happy to know that snowshoeing is affordably priced. Your required gear includes snowshoes and appropriate attire; poles are also recommended, but not required. If you want to try before you buy, REI Co-op stores around the country can rent you snowshoes and poles.
It requires only a few basic techniques: Few outdoor activities are as beginner friendly. If you plan to venture off easy trails, you'll need to learn how to go up and down hills, traverse slopes, use your poles, how to get up after you fall in deep snow and how to avoid and prepare for avalanches. Taking a class or going on a tour can offer great opportunities to learn these concepts.
What You Need to Go Snowshoeing
Here are the basics for your first time snowshoeing:
- Get snowshoes that are right for your weight, the terrain and the snow conditions
- Wear warm, waterproof boots
- Dress in layers with clothing that can handle cold, wet conditions
- Bring adjustable poles with snow baskets (optional, but recommended)
- Don't forget to bring the Ten Essentials
How to Choose Snowshoes
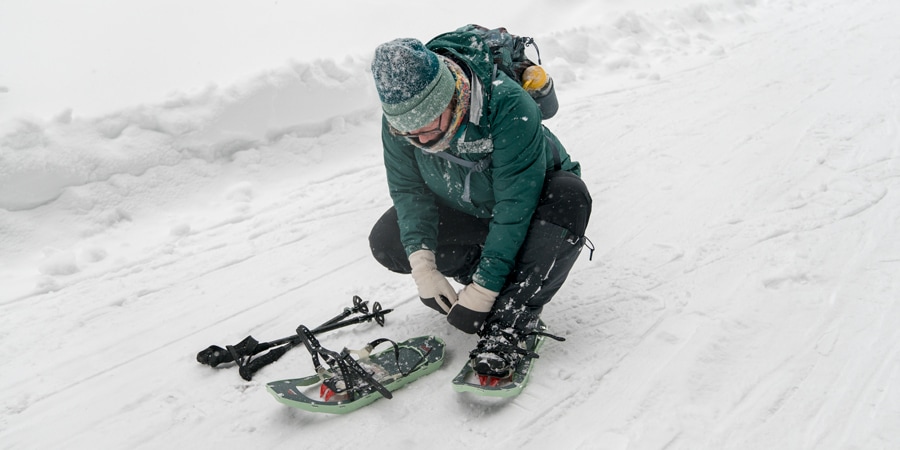
If you're just getting into snowshoeing, renting gear is a great way to get started. The rental shop will set you up with snowshoes suitable to your weight and the conditions where you'll be snowshoeing.
If you're buying your first snowshoes, flat terrain snowshoes are a great first choice. These are entry-level models that also offer good value. They're designed for easy walking on flat to rolling terrain and are ideal for beginners or families.
Make sure you check the maximum recommended load for your snowshoes (your weight plus the weight of your pack filled with gear should not exceed the recommended load) and take into consideration the type of snow you'll be travelling on (powder snow requires snowshoes with a larger surface area to keep you floating on top of the snow). To learn more, watch our video and read Snowshoes: How to Choose.
Video: How to Choose Snowshoes
How to Dress for Snowshoeing
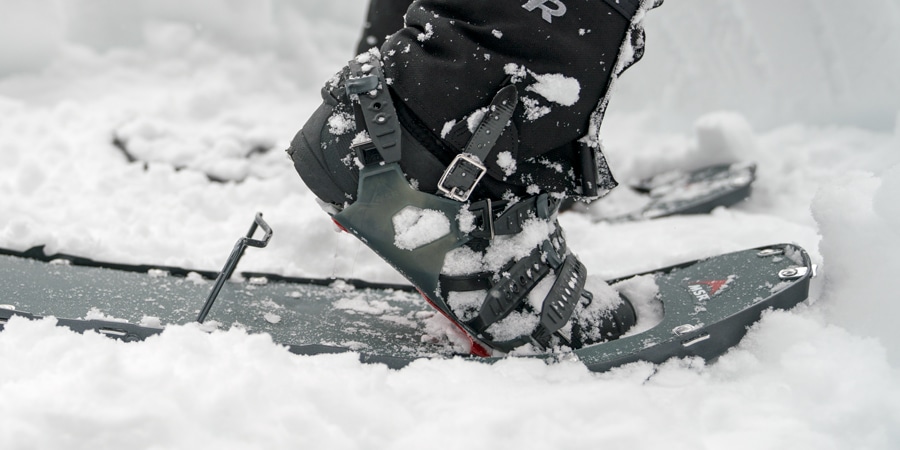
Wear suitable boots and socks: The good news is that snowshoes adjust to fit pretty much any type of boot or shoe. So, your main concern is to wear something that keeps your feet comfortably warm and dry. Insulated, waterproof winter boots with thick soles and rubber or leather uppers are ideal, but sturdy waterproof leather hiking boots can also work. Wool or synthetic socks that wick sweat are a must—carry an extra pair in case yours get soaked.
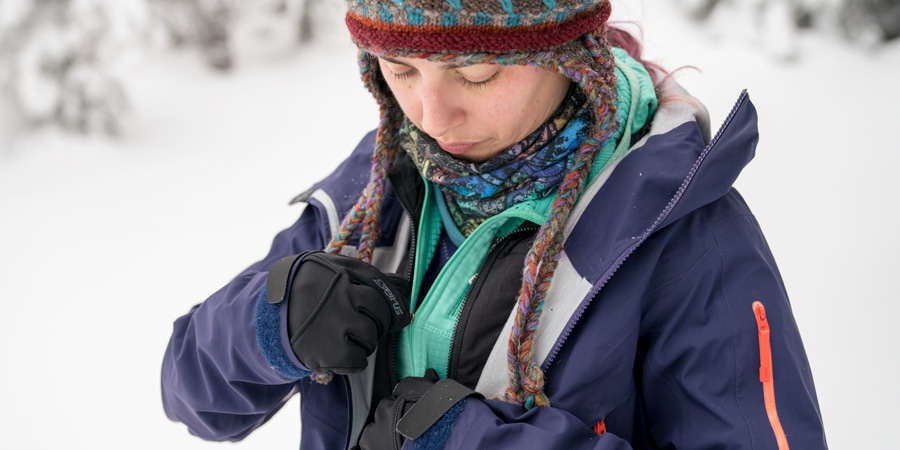
Dress in (non-cotton) layers: As always when exercising outdoors, dress in layers so you can adjust your clothing to suit your activity level and the weather. Avoid cotton because it can get soaked and chill you, and instead choose synthetics or wool styles because they wick moisture and retain warmth even when wet. Note: Cross-country ski clothing is designed for aerobic winter activity, and can do double-duty as snowshoe clothing.
- Base layer: Choose a lightweight or midweight base layer based on the temperature forecast and your activity level. A zippered top lets you vent as you heat up and zip up for warmth during rest stops.
- Mid layer: Soft-shell jackets and pants make good insulating mid-layers because they retain heat when wet, move freely and breathe as you exercise. Polyester fleece mid-layers can also work in a pinch.
- Outer layer: For your outer layer, choose a waterproof, breathable shell jacket and pants to help keep you dry, and fend off wind. Pit zips are a good idea for added ventilation because you'll be working up a sweat and you don't want to overheat.
- Hat and gloves/mittens: Keep your head and hands covered to prevent loss of body heat and to protect from sunburn. A wool or synthetic hat, headband or balaclava retains heat during cold, blustery days; a wide-brimmed hat or a ball cap can shade your eyes on sunny days. Waterproof ski gloves or mittens are a must to keep your hands dry and warm. You can also combine waterproof/breathable shells with wool liners or light fleece gloves. In milder conditions, glove liners may be all you need, but have a backup waterproof pair with you, just in case.
- Sunglasses and sunscreen will protect you from UV rays, which are more intense when reflected off of snow, and can cause both sunburns and snow blindness.
- Gaiters keep snow out of your boots. For deep powder, you need a high style with waterproof/breathable fabric.
For a comprehensive list of both clothing and gear you should consider bringing on a day tour, look at our Snowshoeing Checklist.
Where to Go Snowshoeing
Guidebooks can offer some inspiration for snowshoe destinations. Generally, though, the following options are good when you're just getting started:
- Sign up for a snowshoe tour or class (classes are available to learn both snowshoeing techniques and avalanche preparedness)
- Cross-country ski resorts. These areas charge a fee to use their trail system.
- Permit areas. Known in some states as sno-parks, these are areas where you can park (with the appropriate permit) in a plowed location close to trails and snow-play areas.
- Any area where you hike in the summer.
- National forests and state parks.
A note about snowshoeing etiquette: You don't have to stick to trails when snowshoeing, though you likely will begin with trails for your first few trips. Occasionally, you may find yourself sharing a trail with cross-country skiers. Those skiers pay higher trail fees to support the equipment and staff that groom these trails, so make sure you walk single file and do NOT step on the ski tracks on those trails. Snowshoer missteps can also ruin the smooth skate-skiing surface in the center of trails, so walking at the outer edge of the trail is best. Skiers also have the right-of-way on trail systems because it's easier for a snowshoer to step off the trail safely than it is for a skier to stop or go around.
Try to avoid trails used by snowmobilers by reading trail markers carefully. If you do find yourself on the same trail, snowmobilers (and snowmobile grooming machines on cross-country trails) have the right-of-way. Keep an eye out or listen for motorized vehicles headed your way. Simply move off trail to let them pass.
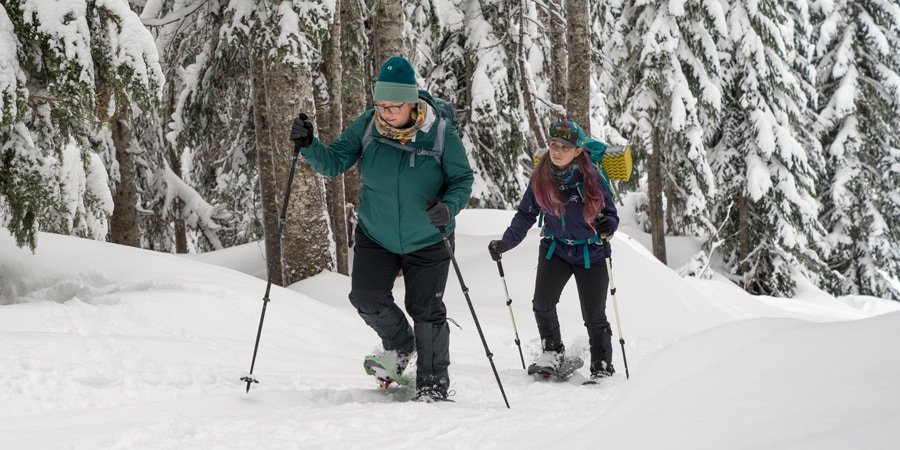
How to Snowshoe: Basic Techniques
How to Snowshoe on Flat Terrain

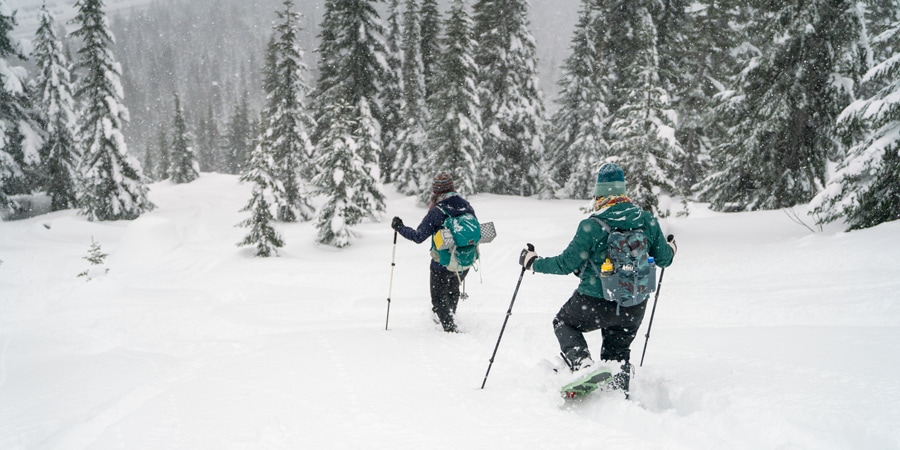
Walking on flat or rolling ground is fairly intuitive. Your stride should be wider than it is for hiking in order to avoid stepping on the insides of your snowshoe frames. Because of that, you may find your hips and groin muscles aching a bit after the first few times you snowshoe.
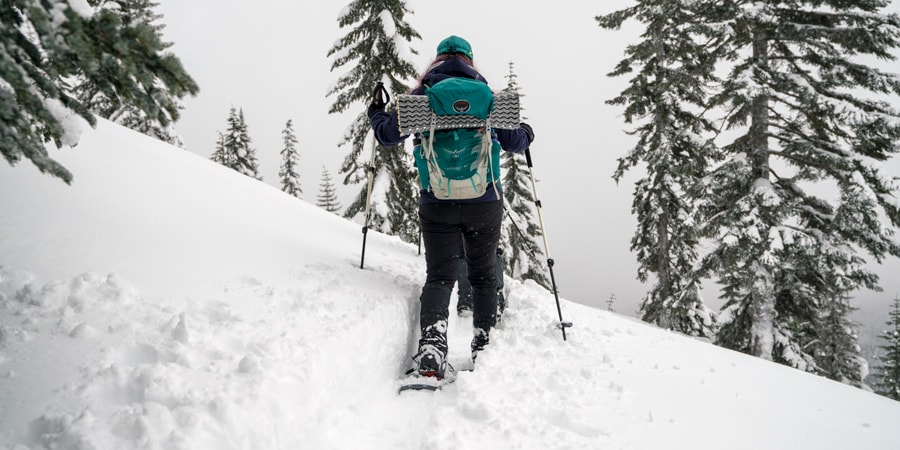
How to Snowshoe Uphill
As you ascend hills, you use your toe or instep crampons for traction. Always place your feet firmly on snow, poles in front of you. Several techniques come into play, depending on the conditions.
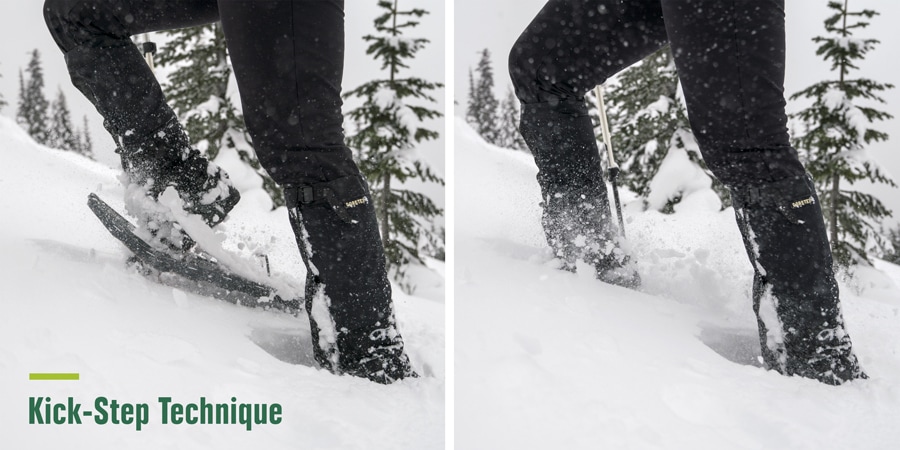
In powdery snow, use the kick-step technique. Pick up your foot and literally kick into the snow with the toe of your boot to create a step. It will take more than one try to build a surface solid enough to stand on. Your snowshoes will be on the angle of the slope, with the backs hanging downhill behind you and the toes above your boots. This plants the crampons or cleats of the snowshoe into the snow, directly under the balls of your feet. If conditions are such that a kick-step ends up just creating a deep hole in the snow, then look for a different route.
On crusty, hardpack snow, you probably won't be able to kick-step. Instead, you'll be relying on the traction of your snowshoe crampons or cleats, and your poles. Walk up the slope, but if it's too steep, try to find an easier traversing route.
On moderate to steep slopes, flip up the heel lift feature (also known as a climbing bar or televator) found under the heel on many snowshoes. This puts your foot in a neutral position when moving uphill and makes it easier to sustain a long ascent.
How to Snowshoe Downhill
On descents, keep your poles planted in front of you, knees bent and relaxed, and your body weight slightly back. Walk smoothly and plant your heel first when you walk. (On some slopes you might never rotate to your toe after planting your heel, because that risks having your leg slip downhill.)
Poles provide additional balance and control as you descend—just make sure you adjust them to be a little longer for your descent.
Avoid over-swinging your leg as this can cause the back of your snowshoe to catch and throw you off balance. If the slope steepens, be sure to keep your weight back. If you start to slip, just sit down.
How to Traverse on Snowshoes
Traversing or "side-hilling" is a common method of travel and can be used to avoid overly steep or difficult terrain. Keeping your balance is key.
Push the uphill side of each snowshoe into the slope to create a shelf as you move along. Keep your weight on the uphill snowshoe.
If possible, walk in the steps made by the person in front of you.
Use your poles. Extend the downhill pole and shorten the uphill pole until their tops are even when their tips touch the snow.
How to Use Snowshoe Poles
While optional on flat terrain, poles come in handy on many snowshoeing outings. They not only provide you better balance, they also help give your upper body a workout. Adjustable poles are best because they can be shortened for uphill travel or lengthened for descending. (And, as just discussed, they can be different lengths when traversing.)
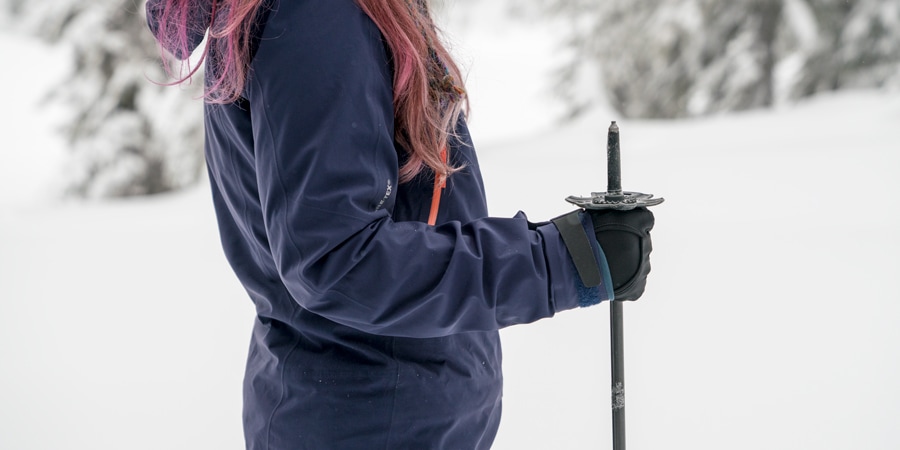
To set your pole length for flat terrain, flip your pole upside-down and grab the pole just under the basket. Adjust the length until your elbow is at a right angle.
Put your hands up through the pole straps from below. This allows you to rely on the straps alone when you need to relax your grip in order to give your hands a brief rest.
Video: Pole Basics for Snowshoeing
How to Get Back Up After a Snowshoeing Fall
It doesn't happen a lot, but you can—and likely will—fall at some point when you go snowshoeing. This occurs most often on descents. When you feel yourself starting to fall, try to fall toward the uphill side if at all possible. Before you can get back up, you'll need to slip your hands out of the pole straps (if you have them) and shift around until your head is uphill, your feet are straight downhill and you're facing the slope with your knees pulled up close to your chest. Your goal is to press off the slope until you're upright on your knees; then you can shift your weight onto your snowshoes and stand all the way up.
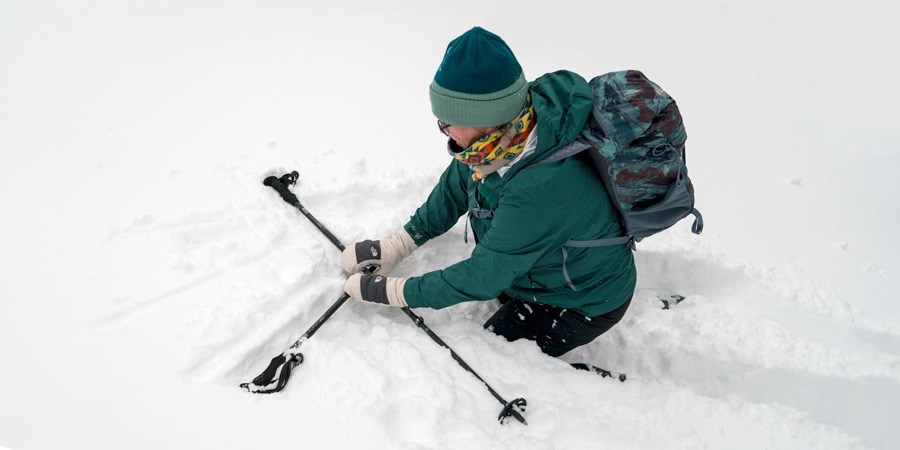
If you have poles: Slide them under your chest, parallel to the slope, and then use them to press yourself up off the slope. If you fall in deep snow on flat terrain, you can make an "X" with your poles on the snow in front of you, then use the middle point as a brace while you push yourself up to a standing position.
If you don't have poles: Open up your hands and press down, which will likely create holes in the snow. Fill the holes with more snow, then press down into the same spots again. Repeat until you've built a solid base of compacted snow that you can use to press yourself up off of the slope.
How to Run in Snowshoes
If you plan to trail-run in snowshoes, you'll need special trail-running snowshoes that are narrower and lighter than traditional snowshoes. These are typically worn with lightweight running shoes or cross-trainers.
Video: Tips for Running in Snowshoes
Snowshoeing Safety Tips
Stay within the limits of your knowledge, conditioning, the environment and your gear. Use established trails at first—many ski areas have them. Using resort trails keeps you closer to potential help, and reduces the risk from avalanches. Avoid snowshoeing alone whenever possible. Regardless of your group's size, always leave your trip plan with a responsible person and let them know when you'll be back—and stick to your trip itinerary.
Here are additional tips:
Check your gear: Always come prepared with the appropriate gear (see our snowshoeing checklist), including plenty of warm clothing, food, water and the Ten Essentials.
Know the hazards: Be aware of your surroundings. Backcountry travel hazards include falling in at creek crossings, being surprised by changing weather, the threat of avalanches and the danger of falling into a tree or rock well. Learn about these hazards before you go into the backcountry.
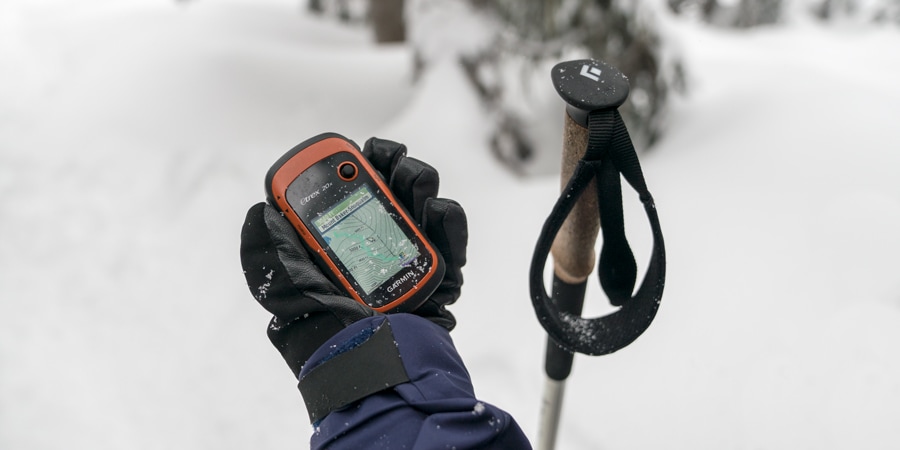
Know how to navigate: If you plan to venture away from a patrolled ski area, be sure you and your companions are prepared. Carry a topographic map of the area, a compass and possibly a GPS to help you navigate—and make sure you know how to use them before you go.
Stay warm and dry: Carry extra layers for warmth, particularly an extra base layer (long underwear) top in case the one you're wearing gets wet from exertion or the weather. Know the signs of hypothermia so you can recognize them in yourself and members of your party.
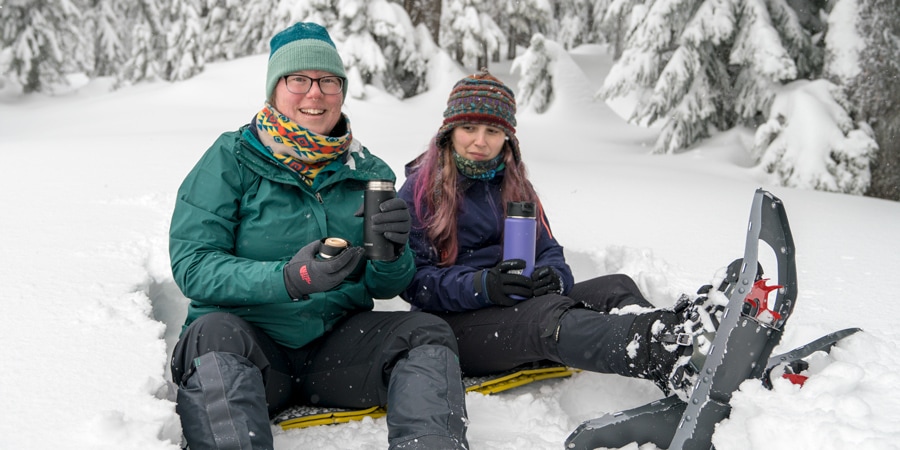
Stay hydrated: It's as important to drink during cold-weather exercise as it is in summer. Not only does water keep your muscles functioning, it also helps your body fend off hypothermia. If you use a water reservoir, it helps to have a pack with an insulated tube sleeve. If you use a water bottle, keep it from freezing by using an insulating cover. A vacuum bottle with hot drinks or soup can help you stay both hydrated and warm. (And you'll make friends if you share.)
Know avalanche safety: If you plan to go into the backcountry, make sure every member of your party carries an avalanche beacon, probe and a shovel, and that they know how to use them all. Check avalanche forecasts and snow conditions before you head out, and always avoid avalanche-prone slopes. Pay attention to signs of unstable snow and either reroute or turn back if you encounter them. Many REI stores and other groups offer courses in winter travel and avalanche safety.
Remember: Safety is your responsibility. No internet article or video can replace proper instruction and experience—this article is intended solely as supplemental information. Be sure you're practiced in proper techniques and safety requirements before you engage in any outdoors activity.