A regular coating of fresh glide wax makes your skis or snowboard last longer, go faster and turn more easily. If you've never waxed before, this article teaches you the basics.
Video: How to Wax Your Skis or Snowboard
Tools and Supplies
- Ski or snowboard vise
- Rubbing alcohol
- Waxing iron
- Glide wax
- Plastic scraper
- Brush
- Metal file
What Needs Wax?
Glide wax is applied to the entire base of:
- Alpine skis
- Backcountry skis
- Snowboards
- Skating skis
Glide wax is applied only to the tip and tail zones of:
- Classic cross-country skis, including so-called "waxless" skis
For information on grip waxing cross-country skis, see our Grip Waxing Your Cross-Country Skis article.
Choose a Wax
To choose the right glide wax, you'll want to consider temperature-specific waxes, universal waxes, rub-on waxes and fluorocarbons.
Temperature-Specific Wax
Most glide waxes are temperature-specific and are applied with a waxing iron. Temperature-specific waxes are designed to work within an outdoor temperature range, which is listed on the packaging. You can blend two different temperature-specific waxes (e.g. one for temps above freezing, the other for temps below freezing) for cusp temperatures. The right wax will help you go faster—you may have to experiment to learn the nuances.
Universal Wax: If you are purely a recreational skier looking for good results with minimal hassle, choose a universal wax. Universal waxes are applied like temperature-specific waxes, but are designed to work decently in all temperatures.
Rub-On Wax: No time to get out the waxing iron? Use a rub-on wax, applied with a sponge in the ski area parking lot. But don't get lazy; this is not a substitute for regular hot waxing.
Fluorocarbons: Waxes that contain more fluorocarbons tend to glide faster. However, the more fluorocarbons, the more expensive the wax, and high-end wax can get really, really pricey.
For recreational skiers and boarders, a basic hydrocarbon wax is usually suitable. For a step up in glide, go with a low-fluorocarbon wax. Racers often use expensive high-fluorocarbon waxes for the greatest glide.
Prepare the Skis or Snowboard
- For downhill skis, retract the ski brake by depressing the pedal. The brake arms will pop up, parallel with the ski. Hook a large, strong rubber band on one arm, take it over the top of the heelpiece and hook it to the other arm. This holds the brakes out of the way while you wax.
- Flip the ski base-up and tighten the vise around the middle to hold it securely in place. For a snowboard, rest the board on top of the vise. If you don't have a vise, you can use a couple stacks of books to support your ski or board.
- Using a clean rag, moistened with a little alcohol (not base cleaner), wipe off any dust or debris. If the base is visibly dirty, use a wire brush to clean it before applying the alcohol. Allow to dry about 20 minutes.
Apply the Wax
Waxing application requires an iron that maintains its temperature well. Typical home irons have a lot of temperature fluctuation, so ski-waxing irons are recommended.
- Power up the iron. The temperature should be lower for softer/warmer wax and higher for harder/colder wax. The approximate iron temperature is often printed on the wax box.
- Hold a chunk of wax against the base of the iron and let it drip onto the ski or snowboard as it melts. Hold the iron 2-to-4 inches above the ski or snowboard base and move it from tip to tail and side to side, letting the molten wax droplets cover the base completely.
- Place the iron on the ski or snowboard base and spread the wax over the entire base until a layer of wax coats the whole surface. Don't hold the iron in one place for too long, as this could cause the base to blister. Make sure that the wax melts all the way across the ski or snowboard, from edge to edge and tip to tail. If an area is too dry, add more wax. The wax layer should be thin enough that one end dries as you reach the other end.
- Wait for the ski or snowboard to cool and dry completely (30 minutes to 1 hour). Don't cool the ski or board outside because that will cause the wax to get pushed back up out of the pores of the base.
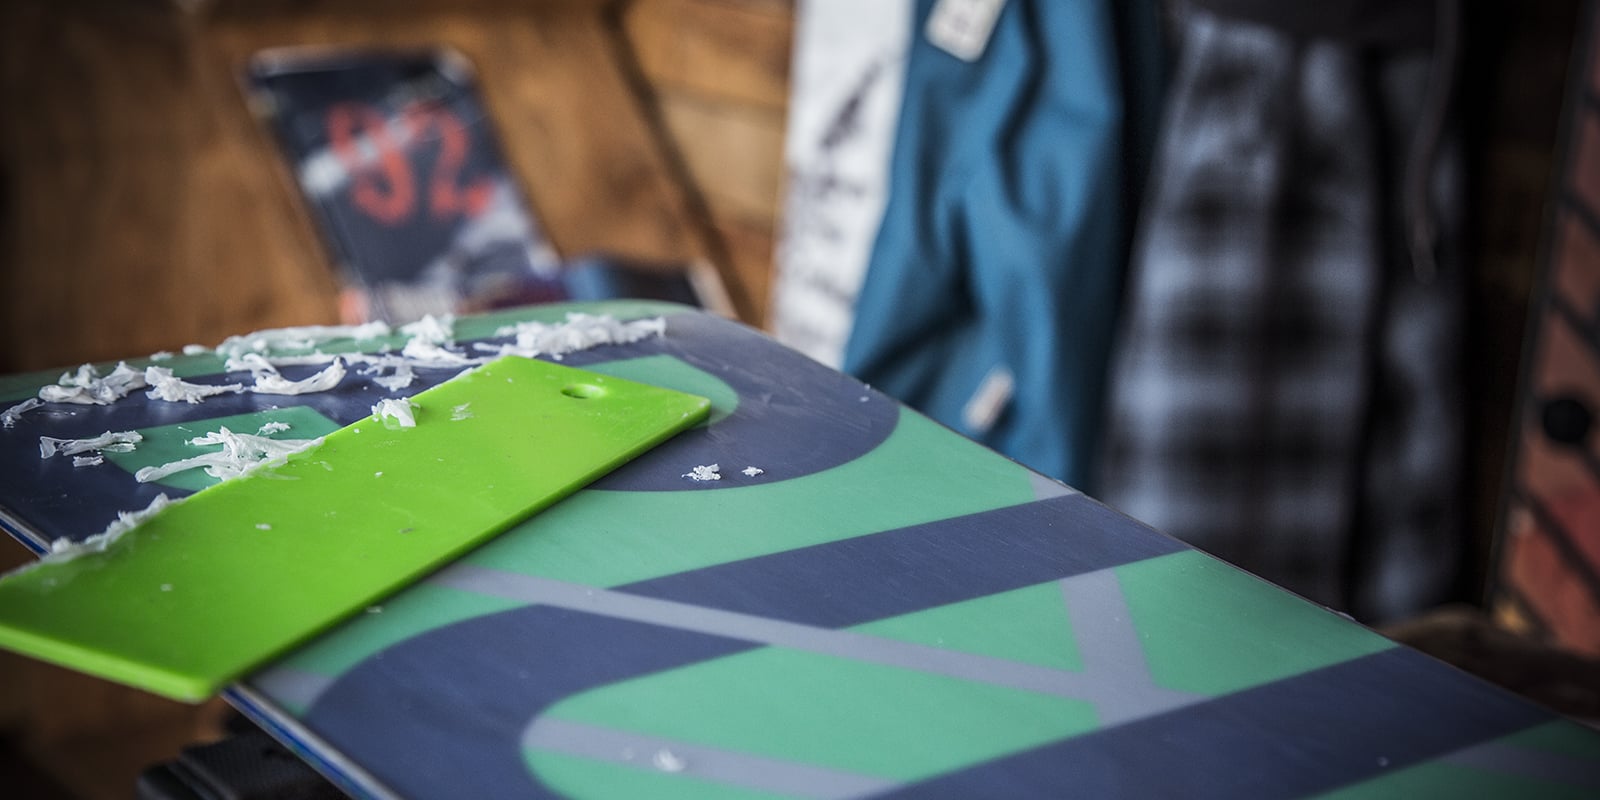
Scraping and Brushing
- Using a plastic (not metal) scraper, scrape the base from tip to tail, removing excess wax in overlapping, continuous strokes. You are finished when the base of the ski or board is nearly free of visible wax. Wax will remain in the pores of the base.
- Make sure to scrape the metal edges of the ski or snowboard. Some plastic scrapers have a small notch for this purpose.
- Brush the base to bring out the structure or texture of the base, which increases your speed. Brushes vary based on size, stiffness and material. A stiff, nylon brush is a good all-purpose choice. Brush from tip to tail, using about 15-20 strokes.
Tips and Tricks for Waxing Skis and Snowboards
- Always apply wax in a ventilated area.
- Your iron should be just hot enough to melt the wax, but not so hot that it is smoking.
- Your plastic scraper should have a sharp, 90-degree edge when you scrape. Use a metal file to flatten the edge of the plastic scraper for efficient wax removal.
- Always work from tip to tail when applying wax, scraping and brushing.