Setting up bindings on your snowboard is easier than it seems, and it requires just a few basic tools. Plus, knowing how to do so helps you understand how your board works so you don't have to feel so dependent on a shop.
This article and video give you the basics of snowboard binding installation for most setups.
Shop REI's selection of snowboard bindings.
Video: How to Mount Disc Bindings
Video: How to Mount EST Bindings
Fit the Bindings to Your Boots
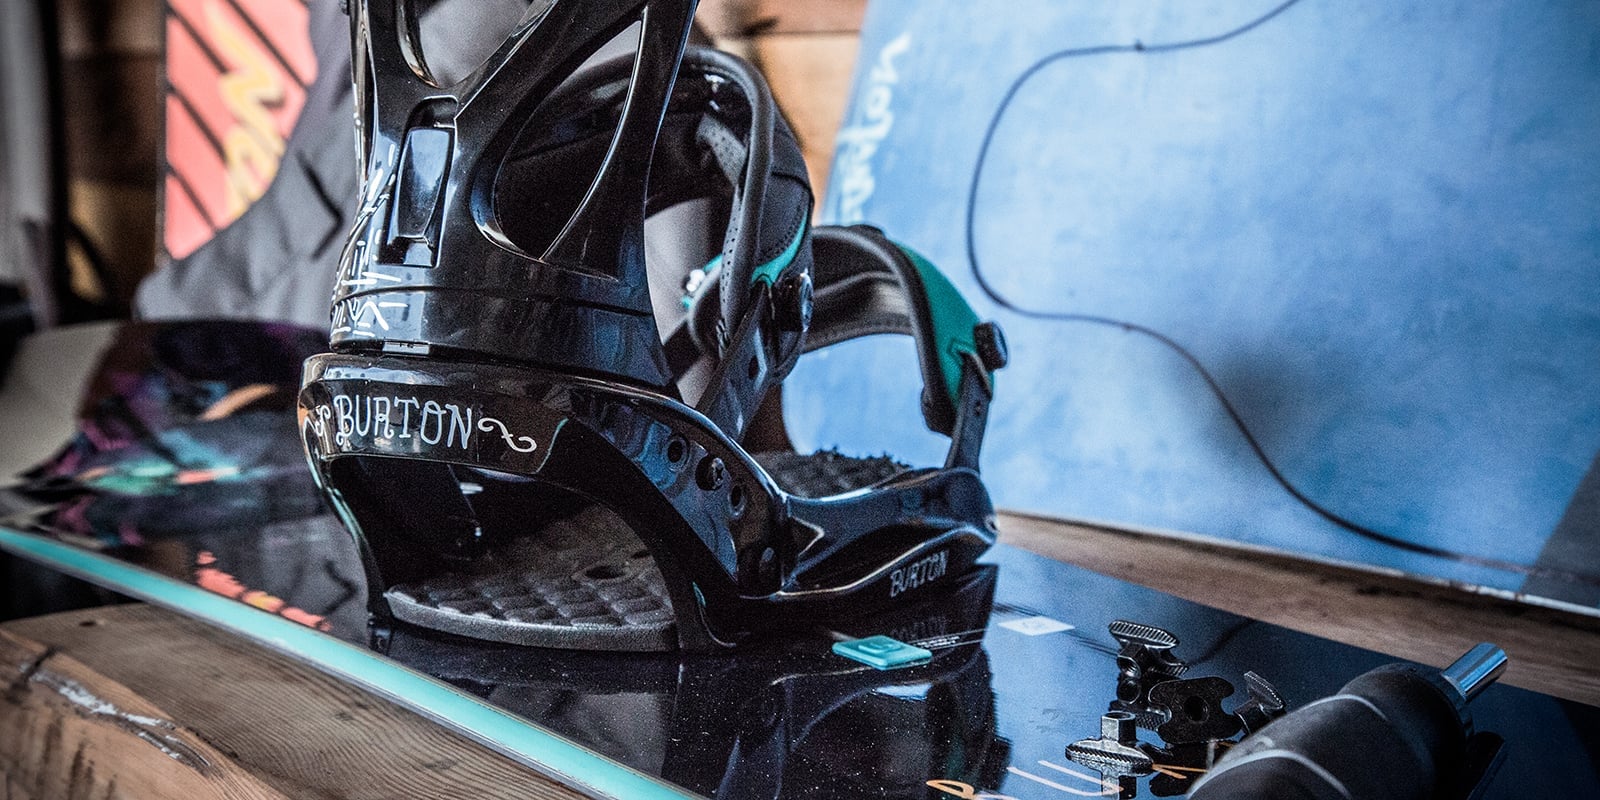
Bindings come in different sizes, so first, make sure you get the right size bindings for your foot. There are some micro-adjustments within sizes to make the binding fit tighter or more loosely. Using a wrench, you can remove the bolts at the base of the ankle straps, move the strap inward or outward, and replace the bolts.
Snowboard Binding / Board Compatibility
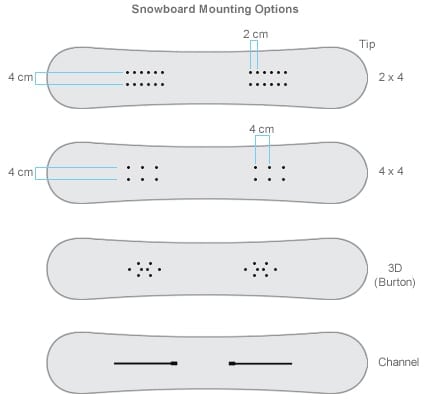
Binding base plates feature discs or bolts that attach to a snowboard's binding interface. Bindings often come with multiple base plates, making them compatible with most snowboards.
Most boards feature bolt mounting patterns that are 2x4 or 4x4. Some Burton boards have a diamond-shaped, "3D" bolt pattern found only on its boards. Burton also has a line of boards featuring The Channel system which works with Burton EST bindings. Some bindings from other manufacturers can be adapted to work with the Channel System by purchasing compatible discs.
If you have questions about binding / board compatibility, ask an REI sales specialist.
Tools for Mounting Bindings
For most boards you need only a #3 Phillips screwdriver to mount the bindings and a wrench to fit the bindings to your boots. For quick adjustments on the mountain, you can use a multi-tool. They're compact and come with other handy tools like Allen keys, flathead screwdrivers and wrenches.
Shop REI's selection of snowboard tools.
Determine Your Lead Foot
To find out which foot will be at the front of your board, stand still on the ground and then let yourself fall forward or have someone push you (nicely!). The foot you use to catch yourself is considered your lead foot. If your left foot goes forward, your stance is "regular." If your right foot goes forward, your stance is "goofy."
Find Your Left and Right Binding
You can tell the difference between your left and right bindings by the direction of the curve, just like with a shoe. You can also look at the straps on the bindings: the straps start on the inside and buckle on the outside of your feet.
Establish Your Stance Width and Offset
Stance width: Most boards have markings on them that indicate the center-mount screw holes for each binding. It's a good idea to start with a center mount and see how it rides.

There are many variations in stance width, binding position and foot angle. Once you get comfortable riding, you may want to play around with these options until you feel well-balanced.
If you're riding a bigger board or if you feel too much pressure on your quads, you may need to shorten your stance. A great way to fine-tune your stance width is by measuring the length of your shinbone. This distance, from just below knee to your heel, is a good starting point for the width of your stance.
Stance offset: Most snowboards indicate a recommended mounting position that is close to the center of the board. This position offers good all-around control and easy turn initiation. As you become more experienced and develop a specific riding style, you may find you prefer to offset (also called setback) the bindings toward the tail of the snowboard. Offset bindings can offer more aggressive turning and better flotation in powder.
Choose Your Binding Angles
Snowboard bindings can be positioned on the snowboard so that your feet are angled forward, backward or somewhere in between.
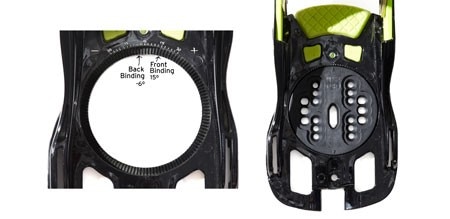
If you're new to snowboarding, mount your snowboard bindings in what is called the "duck stance" position, where both feet are angled away from each other. Many snowboarders position the front binding at a 15° angle and the rear binding at somewhere between 0° and a -6° angle. This is a great position for learning to ride because it forces you to learn correct technique and distribute your weight properly. Most riders don't like to adjust the angle of their stance each time they go out and ride, so "duck stance" is a good default position.
Once your technique is solid, you can try experimenting with the angles.
Steps for Mounting Snowboard Bindings
The following steps are for installing bindings in a "duck stance" at a standard stance width, with the front binding at 15° and the back binding at -6°. If you prefer your bindings set at different angles, these steps still apply but you will need to adjust the angles.
Mounting the Front Binding (Bindings with Discs)
- Pick up the front binding (the left binding if you ride "regular" or the right binding if you ride "goofy") and the disc and position the binding at your desired angle (tip: each tick mark is 3 degrees).
- Place the binding together with the disc over the center screw holes at the front of the snowboard. Position the binding so there will be the same amount of board in front of the boot toe as there will behind the boot heel. (If you're unsure which end is the front of your snowboard, you can look for any writing that runs across the width of the board. With the board positioned so you can read the writing, the end above the writing is the front.)
- Turn the first screw in loosely.
- Insert the remaining screws and screw in loosely. Ensure the binding is positioned properly then tighten all the screws. Do not overtighten. It can be helpful to put a boot in the binding when fine-tuning the binding position.
Mounting the Front Binding (Burton EST Bindings)

- Using your screwdriver, pop the Channel plug out of the Channel at the front of your snowboard. (If you're unsure which end is the front of your snowboard, you can look for any writing that runs across the width of the board. With the board positioned so you can read the writing, the end above the writing is the front.)
- Slide The Channel inserts that came with your EST bindings through The Channel opening. Reinsert the plug.
- Pick up the front binding (the left binding if you ride "regular" or the right binding if you ride "goofy") and place the binding over The Channel inserts.
- Insert screws into The Channel inserts and secure them loosely so the binding can slide.
- Slide binding to your desired stance.
- Pivot the binding to set the stance angle at 15°. The degrees can be seen in the stance indicator window.
- Position the binding so there will be the same amount of board in front of the boot toe as there will behind the boot heel.
- Tighten screws one turn at a time until they are equally tight.
Mounting the Back Binding
Follow the same steps for mounting the front binding, but set the angle at -6° (pointed backward).