When it comes to avalanche safety, one of the easiest things that you as a backcountry traveler can control is where you travel. Your ability to recognize places where avalanches can occur (where snow can slide) will help you know where to go and which places you should avoid. Learning to identify avalanche-prone slopes is one key to making good decisions and managing your risks in the backcountry.
This article will give you a basic overview so you can begin to identify avalanche terrain and select safer routes to travel. If you are planning to recreate in snow-covered mountains, we recommend that you get more formal training.
In this article, we'll cover:
For background on avalanche basics, learn more at Intro to Avalanche Safety.
Remember: Safety is your responsibility. No internet article or video can replace proper instruction and experience—this article is intended solely as supplemental information. Be sure you're practiced in proper techniques and safety requirements before you engage in any outdoors activity.
What Causes Avalanches?
For an avalanche to occur, you need three conditions:
- Snow that is unstable and can slide;
- And to be in avalanche terrain, which is anywhere an avalanche can start, run or stop.
- A trigger to set it off, which can be natural forces such as wind, or human forces such as a person's weight traveling over weak snow.
If you remove any one of those elements, you won't have an avalanche. Of the three (unstable snow, trigger and avalanche terrain), avalanche terrain is by far the easiest element for backcountry travelers to limit. That means that if you can control whether you enter avalanche terrain, you can control your risk. For example, if the snowpack is unstable and you are the potential trigger, but you're not in terrain capable of producing an avalanche (such as a flat meadow), then there's no risk.
How to Recognize Avalanche Terrain
Avalanche terrain is anywhere an avalanche can start, run and stop.
As you travel in the backcountry, look for clues in your surroundings that tell you if you could be near or approaching avalanche terrain. Sometimes the clues are obvious. Sometimes they're not. These observational skills take time and practice to develop. You shouldn't expect to be proficient at recognizing avalanche terrain from reading this article alone. Consider taking more formal education such as recreational Level 1 avalanche courses offered by AIARE and American Avalanche Institute. Or find experienced mentors to learn from or hire a professional guide to develop your skills.
Here are some clues to help you identify avalanche terrain:
Determine the Angle of the Slope
Steepness of the slope is the primary determining factor for where avalanches can start. Is the slope steep enough to slide? Avalanches typically start on slopes between 30 and 45 degrees. Slopes less than 30 degrees typically aren't steep enough to avalanche, while slopes steeper than 45 degrees often don't hold enough snow to slide.
As you venture into the backcountry, pay attention to the steepness of the slope you're on and how steep the slopes are above you. Make sure you're not next to a slope or under terrain steep enough to avalanche. If you're standing in an area that is less than 30 degrees but the slope above you is steeper than 30 degrees, you could still potentially trigger an avalanche that comes down on top of you.
Estimating slope angle can be very difficult. An inclinometer (slope meter) is an affordable, compact tool that you can carry to measure the angle of the slope. Some compasses (even ski poles) have built-in slope meters. Smartphone apps can also measure slope angle but be aware that electronic devices can also interfere with avalanche transceivers. Take time to practice estimating and then measuring slope angles the next time you're in a controlled environment such as on maintained trails or at a ski resort.
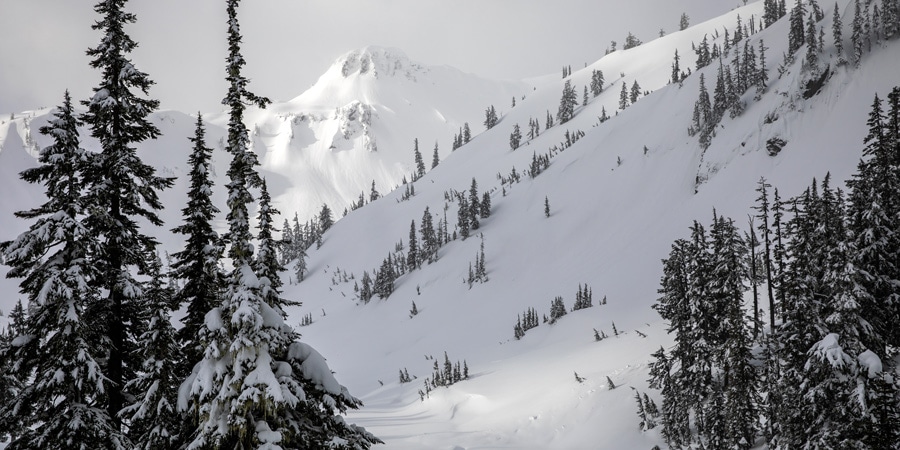
Look for Clues in the Trees
Physical clues in the vegetation can tell you a lot about whether you're on slopes where avalanches can run and stop.
- Look for missing trees below treeline: If you see large swaths of forests that are missing trees or dense forests with areas of open terrain adjacent to them, it's a sign that avalanches have run through before.
- Look for trees with missing branches on the uphill side. Sometimes the trees have branches that are only pointed downhill. That's a good indicator that avalanches have run down those slopes and torn off branches.
- Look for obviously broken trees. Multiple trees broken above ground level can indicate that large avalanches ran through these slopes in the past.
Identify and Avoid Terrain Traps
Terrain traps are any features such as gullies, rocks, cliffs or trees that could amplify the consequences of being caught in an avalanche. As you travel in the backcountry, look for these features that could make being caught in an even small avalanche worse. Find ways to avoid them.
One way to reduce your risks as you tour is to avoid terrain traps, which include:
- Gullies, roads and flat benches. Places where snow would pile up during an avalanche can bury you deeper. This could make avalanche rescue much harder and decreases your chance of survival.
- Rocks and trees in avalanche terrain: A fast-moving avalanche (which can travel up to 80 mph) can cause traumatic injuries by slamming you into hard objects such as trees and rocks.
- Cliffs, crevasses, alpine lakes and creeks: The force of an avalanche can break through frozen ice or push you into a crevasse or an alpine lake.
How to Find Safer Terrain
Now that you have a basic understanding of how to recognize avalanche terrain, you can start to figure out safer areas where you can travel. Below are some examples of safer terrain. Remember that often in snow-covered mountains, it's not simple or clear-cut.
Lower angle slopes: If you're in flat, lower-angle terrain, such as meadows, and you're far from any slopes that are 30 degrees or steeper (none immediately above you that can run down on top of you) then you're in safer terrain. Snowshoers, in particular, can have a great time in the snow while staying far away from avalanche terrain. Backcountry skiers and snowboarders can often find excellent and safe downhill terrain under 30 degrees. For reference, many green circle and easier blue square runs at ski resorts are under 30 degrees.
Dense forest: If you're traveling in areas of dense trees (and you don't see the vegetative clues listed above), that's generally safer terrain. As you travel through dense forest, look for what's above you; you could be underneath a slope that could slide.
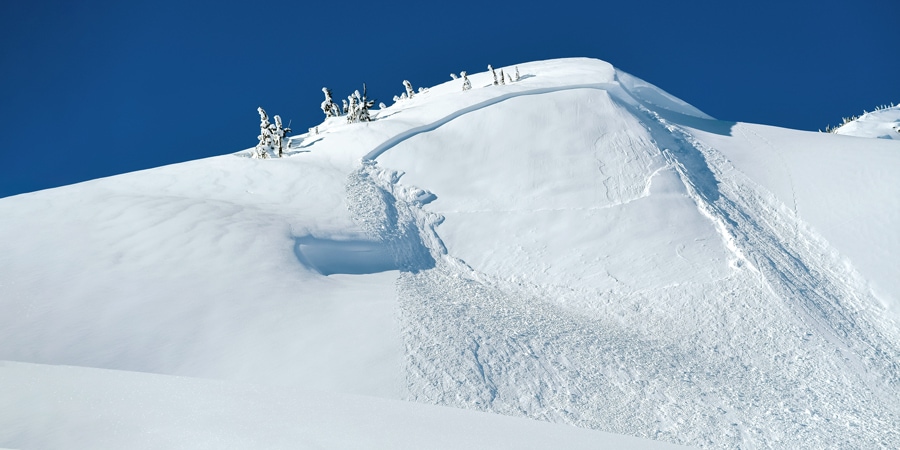
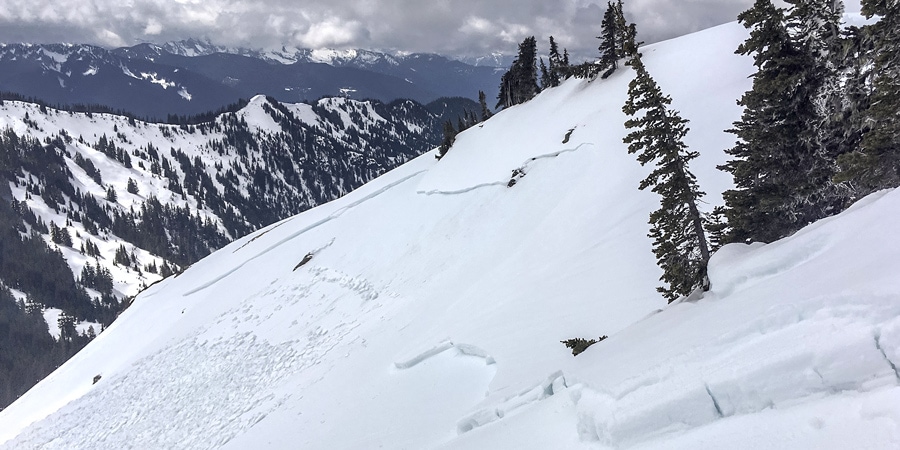
Broad ridgelines: Traveling on broad ridgelines is another safe choice because you're above the slopes that could potentially slide. But how do you get to a ridge safely? Often, you can follow dense forests leading to ridges or the ridge may originate below treeline.
- Be careful if you're on a ridge that dramatically drops off into steep terrain (slopes 35 degrees or steeper) that could be more hazardous because you can slip off the ridge onto the steeper slope.
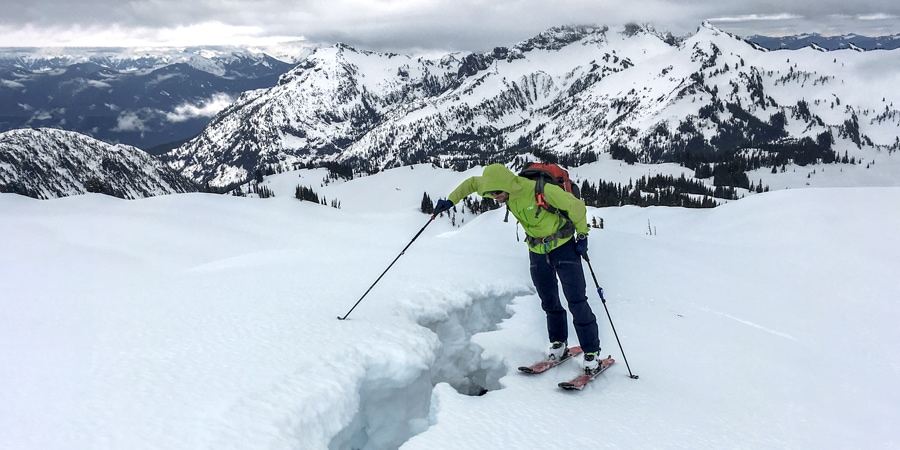
- Beware of cornices—drifts of wind-blown snow that hang off one side of a ridge. It can be hard to tell whether you're standing on solid ground or if you're stepping out onto the overhanging cornice. Stay far from the edges and off cornices that might exist underneath.
Finding safer terrain should be an integral part of your trip pre-planning process. You can gather information about a route even before stepping on snow by browsing physical maps, using online mapping tools, reading guidebooks or talking to others with knowledge of the area.